Skip to Main Content
Sign In
Sign In

Best Deck Boxes & Patio Storage With Reviews

Top-rated customer favorites with reviews

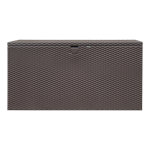
Spacemaker 134 Gallon Deck Box

Spacemaker 134 Gallon Deck Box

$285.99

Rated 4 out of 5 stars.

08/06/2019
Large capacity perfect for cushions. Thin metal but still feel solid once assembled. Looks good. Many people complained about the BB screws which come with the kit. Did not experience a problem. Found that they fit pre-existing holes better than store bought which were either too large or too small diameter. This being said, assembly requires care and strategy and the manual is not sufficiently detailed. Before assembly inspect all panels for any distortions. In may case nothing major , the lip of the lid was a bit deformed by a bump and I corrected it using pliers covered in tape to protect the finish. Assembly advice: 1-it is much easier if you can assemble on a table and not on the ground 2- Do not tighten the screws in a particular row before you have put them all of them in that row. There should be some give so that you can align the last holes. 3- As you assemble and add panels, access to the screw holes located at the bottom become more difficult and you cannot see very well. So for any row on the side panels, do the bottom screws first as they are easier to align ( do not however tighten them ) and then you do the rest, finishing with the screws near the top where you can more easily see if there is any misalignment and correct it by moving the panel a bit up or down ( a plastic hammer is nice for that , but a piece of wood will do, do not use steel hammer ). Then you tighten the screws in that row. You need two people to manipulate the box at the end. The result was well worth it. This look like it is rodent-proof contrary to all the plastic ones. To get longer life out of it I wanted to paint over , but nothing would really stick to it well ( I did a test on the floor panel) . So instead I am using an automotive high tech paint protector for cars which make water pearl. I use it only on the lid, Finally it might be advisable to raise the box a bit above the patio wood floor , so that the bottom do not sit in water and also to aerate the wood under the box.
Latitude Run Adelita Deck Box

Latitude Run Adelita Deck Box

$277.99

Rated 5 out of 5 stars.

05/02/2020
Received and assembled last week. Roughly 2 hour assembly time. Will be used in the northeast on a covered porch w/ afternoon direct sun, perhaps driving rain. Will be stored in barn for winter. Comments - mainly on the negative comments I read before buying: 1. Waterproof, or lack thereof. Top has a thin plastic lining under wicker, water should run off. Sides are wicker, you can see light through it, with rain hitting sides water will get in. This appears typical of all wicker deck boxes. 2. Assembly - holes do not line up. Not so with mine; of about 20 assembly screws only the last one took more than a few seconds to get started. Hinge pins were a little more difficult, but playing with the top (open all the way, close, up, down, etc.) was able to get all three done in about ten minutes. 3. Top does not close properly - not so with mine. Instructions clearly say to loosely assemble and not tighten screws until they are all in. Prematurely tightening screws could cause misalignment. 4. Tightening all those screws with Allen wrenches (provided in parts bag) is a pain. True. I recommend using a hack saw to cut off the short leg of one of the Allen wrenches, and using the long, straight leg in your cordless drill. Also use the drill's torque adjustment to dial down the torque to prevent stripping the screw threads. 5. Bottom is "flimsy" because it is just wicker fabric over the steel frame. True, but easily remedied with a roughly 2' x 4' piece of luan or other thin plywood. The ~1" square steel tubular frame on the bottom provides excellent seating for the plywood so you can store heavier objects without damaging bottom wicker. One last plus - they provide spares for every type and size of screw and washer. Overall - exceeded my expectations for a ~$225 piece.
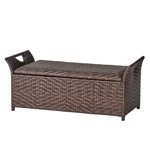
Latitude Run® Adelita 52'' W 100 Gallons Water Resistant Wicker Deck Box in Brown

Latitude Run® Adelita 52'' W 100 Gallons Water Resistant Wicker Deck Box in Brown

$279.99

Rated 4 out of 5 stars.

04/13/2022
This deck box was purchased to replace 2 other highly rated similar molded plastic deck boxes I purchased from Wayfair within the past 2 years, both of which cracked or literally fell apart and were useless. The good news: this is the first item I've ordered from Wayfair in 2 years that arrived undamaged. The bad news: it's solid brown, not the variegated brown/tan color shown in most of the photos online. Assembly: if you follow directions, it goes better; The lid only goes on in one direction. Also, don't tighten screws until they are all in place, or the screw holes won't line up. What I like: the size/interior space is good for storing pool hoses, floats, etc. It has feet at the corners, so it stands a few inches above the ground and water can drain under it. What I don't like: the lid does not lock and there is a slight gap between the lid and the top; I suspect it will be blown open in a thunderstorm. There are open spaces on the sides for lifting, but this will allow rain in. Finally, while it has a steel frame, the bottom is the plastic "wicker" and I would not trust putting anything that weighs more than 5 lbs on the bottom or it will eventually tear or break the bottom. I did place a board inside resting on the bottom over the steel frame so that I can store some pool chemicals inside. If this box fails like the others, I will look for something solid wood or build one!
Keter Brightwood 120 Gallon Large Durable Outdoor Storage and Weather Resistant Resin Deck Box (Choose Color)

Keter Brightwood 120 Gallon Large Durable Outdoor Storage and Weather Resistant Resin Deck Box (Choose Color)

$138.99

Rated 5 out of 5 stars.

01/23/2020
The deck box arrived quickly. I waited for a friend to come over to help me put it together, and he just took over. (My plan all along! LOL) He had it put together in no time! The deck box is great looking, sturdy and very large! I love it! The goal is to reduce clutter on the deck so looks cleaner and more inviting. I also like how you can sit on it!! I should say that one small piece was missing; the right front corner end piece. I called the manufacturer, Keter, to let them know and customer service was awesome. I mentioned I was hoping to be able to email so I could send a pic because I could not find the part #, nor official name of the part. He gave me the email address and I sent it. I think it was 3 days later I received not just one, but five end pieces! LOL I was impressed that I actually received the missing part in less than a week! That's rare! I was glad I ordered one as a test for size on my porch because this is big. I have it on my front porch against the house next to the front door, and was going to put one on the other side of the door. Unfortunately it's too big and would be in the way of walking to and from the door and car. I have a pretty empty corner of the porch that doesn't get used much so I may put this one over there and see if there are two that are about the same height but not as deep (front to back). I do recommend this deck box!
Loon Peak® Ermont 44.5'' W 65 Gallons Water Resistant Solid Wood Teak Deck Box in Natural

Loon Peak® Ermont 44.5'' W 65 Gallons Water Resistant Solid Wood Teak Deck Box in Natural

$187.99

Rated 4 out of 5 stars.

07/24/2022
The “hinges from hell.” The deck box itself is quick and easy to build, but the hinges took me an additional 60 minutes. I was eventually successful, so here are the steps I followed. I broke the installation into two parts – installing the hinges onto the side panels, and installing the lid onto the hinges. INSTALLING THE HINGES ONTO THE SIDE PANELS. Step one – loosen the hinge springs. YOU WILL NOT BE ABLE TO MOVE THE HINGES UNLESS YOU LOOSEN THE SPRINGS. The hinge springs come tightened down as far as they will go, so you will not be able to manipulate the springs unless you adjust their tension. Insert the Allen wrench that comes in the hardware kit into the lower end of the spring, and loosen the tension nut until there is at least 1 ½” of the tensioning screw showing. I think the tension screw is around 2” to 2½”, so do be careful not to remove the tensioning nut entirely. Step two – Close the hinge and fit it in place. There are no pilot holes drilled for the hinges, so you have to figure out where to install them. The hinges come in an open position, so you need to close them before you can fit them to the box. Otherwise you’re just guessing at where to install the hinges. The springs will be flopping around after you loosened the tension nuts, but the hinges will still very difficult to manipulate. I found it helpful to use a large pair of pliers to grab the front of the hinges’ top plate, and use the leverage of the pliers to pull the top plate down into the closed position. Be careful of grabbing just the edge of the top plate, because you can easily bend the metal. Also watch your fingers. The hinges have a LOT of tension, so they can seriously pinch a finger. Squeeze the hinge halves together to make sure the top plate is all the way closed. Line up the rear edge of the closed hinge with rear panel of the box. I aligned the hinge so that the top plate is flush with the top edges of the box’s side and back, and is butted up against the back panel. Now you can install two of the three mounting screws into the hinge’s side mounting panel. The third screw hole will be blocked by the spring, so you’ll have to open the spring again to install that one. I used an awl to create a starting hole for the screw, but it also wouldn’t hurt to drill a small pilot hole. That will help prevent you from stripping the screws, since they’re fairly hard to drive in. Drive the first two screws in all the way. Don’t pay attention to the instructions telling you to keep the screws loose. You need the hinge to be securely fastened to the box so you can open it back up again to install the third screw. With the first two screws installed, open the hinge up again so you can access the third screw hole. The best way I found to open the hinge by hand is to lift up on the front corner of the top hinge plate, the portion furthest from the back of the box. The hinge will be tight and difficult to open, so again, watch your fingers. Install the third screw, and the hinge should be secure attached the box. Repeat the steps above to install the second hinge onto the other side panel. INSTALLING THE LID ONTO THE HINGES Fully close both hinges again, so the hinge top plates are flush with the top edge of the box. Finish tightening up the all the screws that attach the box’s sides, front and back. The instructions way to keep the screws loose, but the box needs to the square and tight for the next step. Lay the lid upside-down on the cardboard packing box. This will help prevent the lid from getting scratched. Turn the assembled deck box upside-down, and place it on top of the lid. Align the box so the outside edge of the rear panel is flush to rear edge of the lid. Adjust the box left to right so it’s centered on the lid. I found that ½” on either side centers the box pretty well. Mark the spots for the lid screws using the holes in the hinge top plates. The hinge springs will be in the way, so use a knife or something long and thin that can slide between the spring coils and mark the places to install the screws. I found that rear screw holes were 2 ½” from the back of the box, if that helps. After you’ve marked all four holes, remove the box from the lid. I strongly recommend that you drill pilot holes for the lid screws. It’s difficult to drive the screws into the wood, so it’s easy to strip them without pilot holes. Install the four screws into the four pilot holes until they’re about 2/3 of the way in. With the assembled box sitting upright on the ground, slide the lid onto hinges by aligning the screws with the holes in the hinge top plates. Tighten the screws as far in as they’ll go. The hinges will probably still be really tight, so you can loosen them even more using the Allen wrench to back out the tensioning nut.
ServerT:1.890017747879