Upcycled Graphic Wall Art
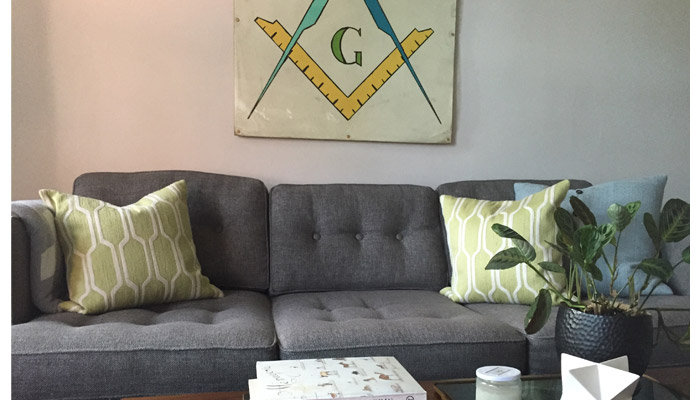
See how we transformed a vintage sign into a piece of art perfect for a modern living room.
Earlier this summer, the Wayfair editors spent a day scouring endless fields of antiques at the Brimfield Antique Show in Brimfield, Mass. To give you a sense of what it's like, take the average yard sale and multiply it by a zillion. Everywhere you turn there's a new treasure to be found, from vintage glasses to antique school lockers; you just have to look (and look and look) for it. You know the old saying "One person's trash is another person's treasure"? That's the Brimfield Antique Show's motto—if it's not, it should be.
Tip!
New to antiquing? Have no fear! Amanda Light, of Prim and Propah, shares helpful tips on How to Shop a Flea Market.
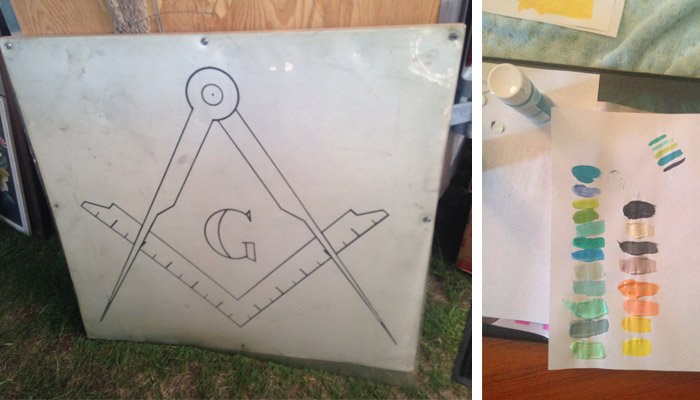
Before / Testing out paint colors
While poking around one of those fields, we found this oversized piece of wall art. It's actually a sign that once hung on the facade of a building in upstate New York. The building was a meeting house for the Freemasons, and the symbol is a compass and a contractor square. We were pulled in by the graphic nature of the design and the interesting plastic cover, which helped the sign stand up to the elements. It was so unique, and at the low price of $20, we couldn't pass it up.
It needed a little love—a cleaning, a splash of color, and new hardware—to bring it back to life. Read below to find out how we spruced up this piece of art.
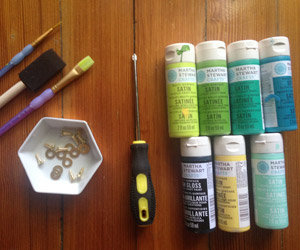
What You'll Need * Paintbrushes
- Paint
- Screwdriver
- New screws and washers, optional (We picked shiny brass to update the look.)
Instructions
We removed the screws and washers with a screwdriver. Then we took off the plastic covering and gave it a good wash with a sponge, soap, and water.
Before replacing the plastic covering, we painted in the design. We chose to fill in the existing design, but we could have also painted in the open space around the design.
To get the right color combo, test the paint out on a sheet of scratch paper. We painted small brush strokes of all of the colors we were considering. After the paint dried, we compared the colors and selected our four hues. We decided to use blue, aqua, lemon, and apple green.
Then, we carefully painted inside the design. Once the paint dried, we reattached the plastic cover with the new brass screws and washers.
Finally, we centered the art above the sofa.
Tip!
To connect the art to a furniture grouping, hang it between 6 and 8 inches over the seating, instead of centered on the wall.
