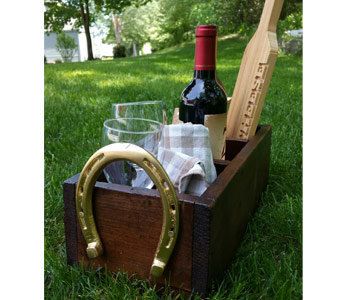
DIY Horseshoe Gift Box
See how an old toolbox was upcycled into a lovely gift box with a touch of vintage.
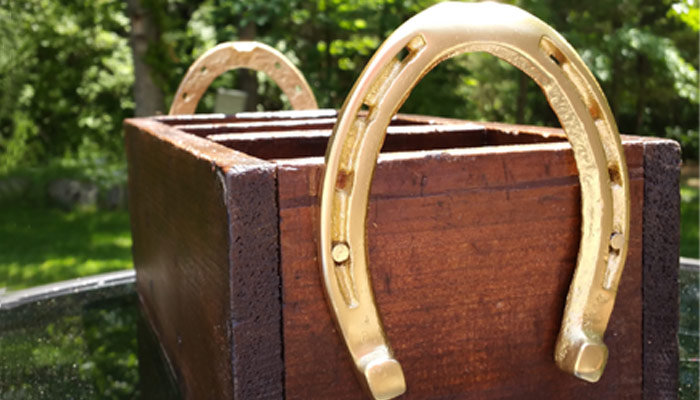
With wedding season well underway, Editor Kate decided to look for a DIY wedding gift at this year's Brimfield Antiques Show. Armed with a $20 bill and fresh-squeezed lemonade, she bartered her way to one grimy old carpenter's toolbox for $7 and two iron horseshoes for $10. Horseshoes are known for bringing good luck to a household—perfect for two people who are joining lives! The idea was to upcycle the old toolbox by adhering the horseshoes as handles, creating a rustic wine and cheese box for the newlyweds.
What You'll Need:
1 rustic box
2 horseshoes
4 hot-dipped galvanized nails
Gold spray paint
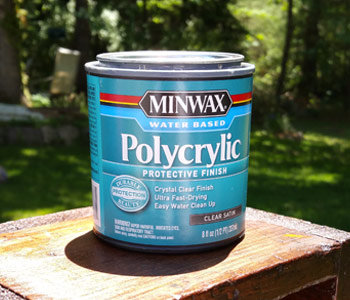
1/2 pint of Polycrylic wood finish
1/2 quart of wood finish stain
Bottle of spray wood conditioner
Bucket for warm water
1 tablespoon of liquid wood cleaner
1 heavy-duty plastic brush
Cost:
This project cost was $17 total—for the box ($7) and horseshoes ($10). We had spray paint, stain, and wood finishes hanging around the house but in case you're looking for new:
- Rust-Oleum Metallic Spray Gold: $3.45
- Minwax: Red Mahogany Wood Stain: $4.93
- Minwax 8 oz. Satin Polycrylic Protective Finish: $8.98
Step 1:
Wash the box with a sturdy brush, a bucket of warm water, and a gentle wood cleaner. Take care not to soak the wood through. Once the box is clean, set aside until completely dry.
Step 2:
If the wood is looking especially dry after you wash it clean, you'll want to apply a conditioner before you stain it. We used Dutch Glow, Amish Wood Milk and applied it with a rag.
Allow 15-20 minutes for the conditioner to set in and dry.
Step 3:
Select your stain color. We went with Minwax's Red Mahogany to ensure the box color didn't clash with our soon-to-be gold horseshoes. Pry open the lid with a flat head screwdriver and dip either a paint brush, foam brush, or the end of old rag into the stain. With stain, it's important to remember that less is more. Start light and you can always go back and apply more layers if you want a darker look.
Set aside overnight to dry completely.
Step 4:
Once your box is completely dry you may want to apply a wood protectant such as glossy Polyurethane or a matte Polycrylic. To keep with the box's rustic appeal, we chose a clear satin (non-glossy), water-based Polycrylic finish by Minwax.
Tip!
Stir, don't shake, wood sealants to avoid creating air bubbles. Also, avoid dabbing your brush—make brush strokes instead—to limit tiny air bubbles from drying in the sealant.
Step 5:
Lay your horseshoes on newspaper in an area away from others. Choose the spray paint color of your choice. We went with Rust-Oleum's Metallic Gold. Hold the spray can approximately 6 inches away from the horseshoes and begin spraying an even coat across the displayed side. Take care to get paint in the time-worn nooks and crannies.
- Allow time to dry. Approximately 5 minutes.
- Once dry flip over and repeat on other side.
Step 6:
It's time to assemble. Horseshoes come with holes specifically designed to be adhered to a horse's hoof, making it easy for you to nail the horseshoe directly into the side of your box.
Turn the box so it's standing on one short end and line up the horseshoe as you desire. Ask a friend to hold the horseshoe in place while you hammer in the nail. Place one nail through a hole on either side of the horseshoe. Flip your box and repeat on the other end with your second horseshoe.
Choosing the right nail is essential. We originally used a roofing nail because it was short and the shaft was thick with a large head. But soon realized its smooth shank prevented it from gripping the dry wood. We needed a nail that was longer (to anchor into the box), thinner (to prevent splitting the wood), and rougher (to grip the dry wood). We found a hot-dipped, 6 penny, galvanized nail did the trick!
Tip!
If the nail is too long, you can file off any excess nail that pokes through into the box. This will smooth down the point to align with the walls of the box.
Step 7:
Style your new rustic gift box as desired!
Take a peek at some of our favorite gift guides for inspiration:
- Top Wedding Registry Gifts »
- Summer Gift Guide »
- Gifts for the Home Bartender »
- Gifts for New Homeowners »