Your Weekend DIY: Quadripod Lamp Project
Take on a unique lighting project this weekend and bask in the glow of your accomplishment!
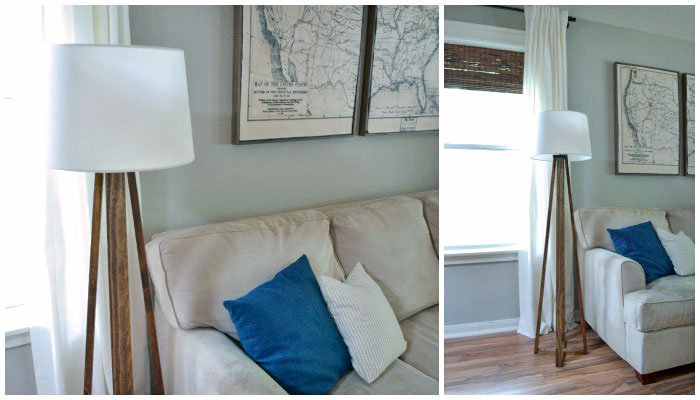
Photo: Sarah Cook
I love incorporating interesting design elements into my home decor, and when I can, I love to DIY them. I needed a lamp next to the sofa and saw a ton of inspiration for tripod lamps online. I wanted to add a slight twist to mine, so I thought about changing up the design a little bit by adding another leg. Thus, the quadripod lamp was born!
I'd love to show you how I built mine.
Materials Needed
5 1x2 wood boards, cut to 4 feet long
1 1x4 wood board cut to 3 1/2 inches long
Lamp kit
Lamp shade
1/8 IP threaded metal lamp nipple, 3 inches long
Wood stain of your choice
Drill bit
1/8 IP nuts and washers
Staple gun (optional)
Pocket hole jig
Pocket hole screws, 1 inch
Step 1:
Cut a 10 degree angle off each end of the four 1x2 boards. The angles should be parallel.
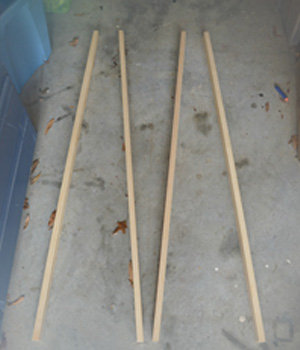
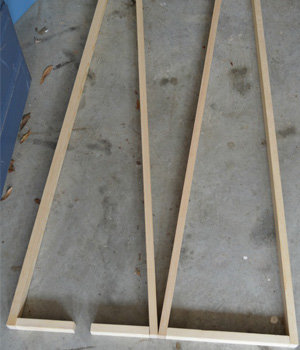
Photo: Sarah Cook
Step 2:
Using the last 1x2 board, cut an 11 1/2-inch piece and angle each end by 10 degrees. Don't cut these ones parallel, though. Cut them both angling inwards at the top. Then cut two 5-inch pieces and angle one end of each piece by 10 degrees. Refer to the photo.
Step 3:
Using a pocket hole jig, drill pocket holes into each of the pieces you just cut, and assemble them in a cross shape.
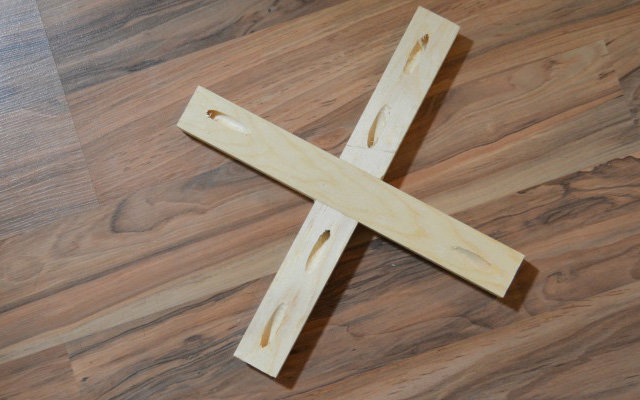
Photo: Sarah Cook
Step 4:
Screw the cross shaped piece you just made into the long 1x2 boards making sure that the long pieces angle inwards toward each other.Also, be sure to assemble this part to where the pocket holes will be facing the ground.
Photo: Sarah Cook
Step 5:
Take the 3 1/2-inch 1x4 board piece and place it on top of the vertical 1x4's. Center the 1x4 boards on each side of the 1x3 piece, and attach them using wood glue and a nail gun.Now that everything is assembled, you can stain it with your choice of color. I used Minwax Provincial on my lamp.
Step 6:
Using a drill bit, drill a hole in the middle of the 1x3 piece, and thread the lamp nipple through. Insert a washer and nut over the top and underside of the 1x3 piece to keep the nipple in place.
Photo: Sarah Cook
Step 7:
Assemble the lamp kit by following the directions on the package. Then, pop your lamp shade on and plug your new lamp in! I ran the cord down the back of one of the legs and carefully stapled it in place so the cord would be hidden.
Photo: Sarah Cook
I am ecstatic over how this lamp turned out! It seems complicated, but the process moves very quickly after all of your cuts are made.I hope you give this DIY Quadripod Lamp a try!
Photo: Sarah Cook
