How to Install Kitchen Backsplash Tile
A step-by-step guide to help you tackle your next DIY project.
Installing backsplash tile is a practical way to infuse your kitchen with major personality and set it apart from typical builder-grade design—not to mention protect your walls against splatters and spills. Follow this step-by-step guide to learn how; it's simpler than you may think.
Level of Difficulty
2 out of 5
Estimated Time Frame
2-4 days
Materials
- Tile
- Pre-mixed mortar
- Grout
- Grout maximizer
- Silicone caulk
- Painter's tape
- Small finish nails
- Scrap cardboard, drop cloth or plastic tarp
- Scrap wood board
Tools
- Notched trowel
- Utility knife or scissors
- Diamond blade wet saw
- Rubber float
- Caulking gun
- 80-grit sandpaper
- Respirator mask
- Safety goggles
- Cloths
- 2-3 sponges
- Measuring tape
- 2-3 buckets
- 24-inch level
- Hammer
- Mixing drill
- Paintbrush
- Professional-grade vacuum
Step 1: Calculate Total Square Footage
Materials and tools: measuring tape
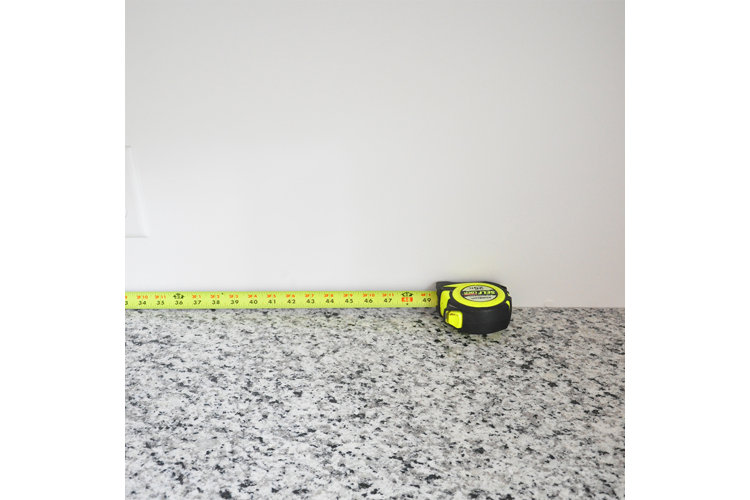
Whether you’re tiling the kitchen or the bathroom backsplash, you want to make sure you get things perfect the first time (and don't overspend). To determine how much tile you will need for your project, calculate the square footage of the backsplash by measuring the length and width of the wall you want to tile. Multiply the two numbers to get the total area.
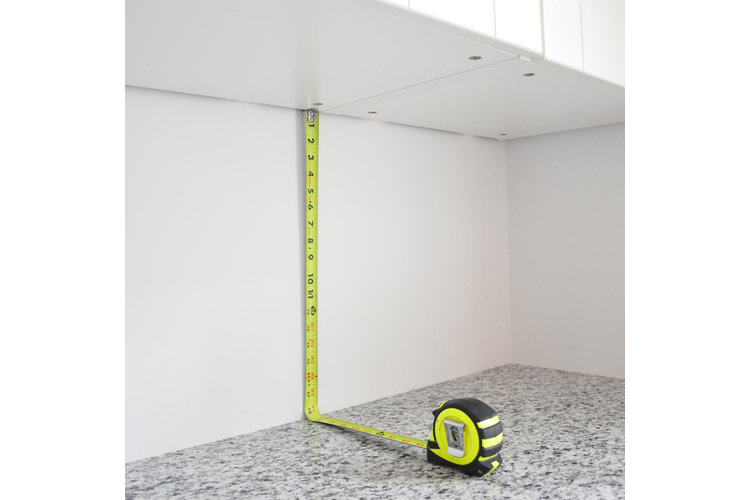
If your backsplash spans over multiple walls, or if you're covering several sections in varying sizes, calculate the square footage of each individual section, and add the numbers together to determine the total square footage.
Make sure to always round up. Add an extra 10-15 percent to your total square footage to ensure you have enough materials in case of chips, breakage, or cutting mistakes.
Step 2: Order Tile Samples
Materials and tools: tile samples
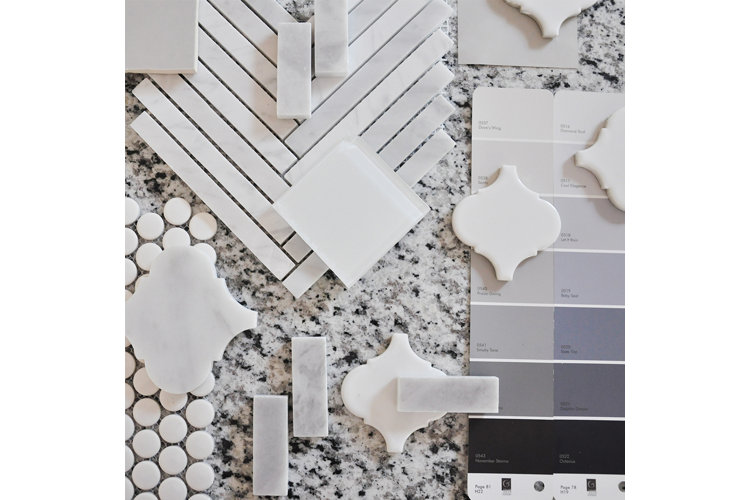
Ordering samples before making a purchase gives you a chance to figure out your style preferences and narrow down your options. You can also test the samples for quality to confirm that the product is the right fit for your project. As a durable option, consider glazed porcelain tile. With its natural resilience to water, it eliminates the need to seal the tile after grouting.
Keep in mind that not all samples are full-size; if you order a sample of a larger tile, you may receive a cut piece of the tile, making it difficult to estimate the correct size.
To prevent under- or over-ordering, use Wayfair’s tile calculation tool to help you determine the correct amount of tile you will need for your project. The tool can be found on any backsplash tile product page on Wayfair.com.

Step 3: Choose Grout
Materials and tools: grout, measuring tape, and tile
When choosing grout, select either a similar color to minimize application imperfections, or a darker color to create a stronger contrast for a more modern design.
Using a measuring tape, calculate the width of grout lines on the mosaic sheet of tile. You’ll need unsanded grout for gaps 1/8-inch wide or smaller and sanded grout for gaps wider than 1/8-inch.
Step 4: Prepare the Workspace
Materials and tools: painter’s tape, scrap cardboard (optional), screwdriver, hammer, scrap wood board, and small finishing nails
Be sure to disconnect and remove any previously installed appliances and eliminate all clutter from the countertops and nearby surface areas.
Shut off power to all nearby electrical outlets and light switches before removing the cover plates.
Tape off the outlets with painters tape to prevent mortar or grout from lodging inside.
Tape two rows of painters tape along the countertop, approximately 1/8-inch away from the wall to protect it from any dripping mortar. Still concerned about making a mess? Lay large pieces of scrap cardboard on the countertops to further protect them during the tile installation process.
Install a scrap piece of wood behind the stove. This board will indicate how far to install the tile in places where there is no countertop to serve as a guide.
Use a hammer and small finishing nails to attach the wood to the wall, making sure the top of the board is flush with the top of the countertop.
Step 5: Sand the Wall
Materials and tools: sandpaper, paintbrush, and shop vac
Use 80-grit sandpaper to gently sand the wall and roughen the painted surface where the backsplash will be installed. A sanded surface will result in a greater bond between the wall and the mortar.
Ensure the surface is clean and debris-free by sweeping the wall down with a paintbrush. Start at the top, and continue sweeping down toward the countertop. Use a professional-grade vacuum to clean the dust.
Step 6: Determine Backsplash Tile Layout
Materials and tools: tile and measuring tape
Lay out the tile pattern on the countertop along the wall where it will be installed or on the nearby floor. Doing so allows you to practice maintaining consistent grout lines, estimate which pieces will require cuts, inspect the quality of the mosaic tile sheets and replace any chipped or otherwise damaged tiles.
Tile from different production batches may have slight color variances. Remember to mix and match tiles from multiple boxes, rather than starting and finishing one box before moving on to the next.
Step 7: Cut Tile Sheets
Materials and tools: tile, diamond blade wet saw, utility knife, and painter's tape
Start with the corner sheet of the first row. Measure and mark your cut line using a pencil and a straight edge. Tape the cut lines with painter's tape to avoid the mesh backing from disintegrating upon contact with water from the diamond blade wet saw.
Before using the diamond blade wet saw, put on safety goggles and a respirator mask. Place the tile sheet face up on the saw so that your cut lines are aligned with the guideline. Slowly and steadily, guide the sheet of tile through the saw to complete the cut.
To accommodate electrical outlets, hold up a tile sheet to where it will be installed and determine which individual tiles need to be removed. Pull the tiles off the mesh backing, and put aside for later use. Using a utility knife, cut out the mesh backing where the individual tiles are attached.
Continue measuring, marking, taping, and cutting the tile sheets from the first row.
Step 8: Apply Mortar
Materials and tools: mortar and notched trowel
Use pre-mixed mortar for faster application. As a general rule of thumb, one gallon of mortar is enough for approximately 50 square feet of tile. Using a margin trowel or scrap piece of wood, scoop some mortar from the bucket onto the notched trowel.
Use the flat side of the notched trowel, and position at a 45-degree angle to apply an even layer of mortar to the wall. If you notice any spots that have less mortar than the rest of the wall, apply more mortar as needed, making sure to drag the trowel in the same direction as before.
Flip to the notched edge of the trowel, and drag at a 45-degree angle to make ridges in the layer of mortar.
Step 9: Apply Bottom Row of Tile
Materials and tools: tile and rubber float
Starting at the bottom corner of the wall, press the tile mosaic sheet to the wall, parallel to the edge of the countertop.
When pressing the tile sheet to the wall, don’t be afraid to slide the tile a smidge to prevent noticeable seams between sheets. The extra friction from the movement also helps create a stronger bond between the mortar and the tile.
Using a rubber float, evenly apply pressure to the newly applied tile sheet to ensure full contact between the tile and the mortar.
Be sure to leave a tiny gap of space between the backsplash tile and the countertop for caulk. This sliver of space is called the expansion joint; tile tends to expand and contract ever-so-slightly based on the temperature of its surroundings. Make sure you leave enough room for it to do so, otherwise, when the tile shifts, it can result in cracked grout.
Take your time with the first row, since it will determine the layout of the remaining tile, be sure to install it as evenly as possible.
Step 10: Cut and Install Individual Backsplash Tiles
When you reach an electrical outlet and need to estimate where to cut the individual tiles that you put aside earlier, start by holding up the individual tile to the place where it will be installed.
Estimate and mark the cut line with a pencil. Then, use a straight edge to darken the cut line.
When measuring and marking individual tiles, place an “x” on the part that will be discarded to help you keep track of the cut tiles.
To cut individual tiles, place face up on the saw, one at a time. Make sure the cut mark is aligned with the blade. Slowly guide the tile onto the blade until the cut is complete.
Install the cut tiles, by scooping a small amount of mortar onto the back of the tile. Using the short, notched side of the trowel, draw grooves into the mortar.
Afterward, install the backsplash tile in the appropriate spot, ensuring uniform grout lines with surrounding tiles.
Once again, use a rubber float to ensure full contact between the tile and the wall. If any mortar oozes from the grout lines, use a thin object, such as a screwdriver, to carefully scoop out the excess mortar from between the tiles.
To double-check that the outlet cover plate will hide all cuts, simply hold the cover plate up to the outlet to ensure no tile edges are showing.
Step 11: Continue Applying Tile Row by Row
Continue installing sheets row by row, making sure the distance between them is uniform and that no seams are visible.
When installing the top row of tile, take a moment to safeguard cabinets by taping off the underside where they meet the wall. That way if you happen to accidentally smear a little mortar during application, it can easily be removed along with the tape.
Periodically use a level to check the straightness of your application. Allow the level bubble to float and settle before reading the level. The bubble should be centered exactly between the two guidelines, indicating that the installation is straight.
If you plan to install a microwave above the oven, installing tile all the way to the bottom of the top cabinet is not necessary, as the appliance will hide it.
Continue applying tile sheets row by row until you’ve installed the entire backsplash. Wait a minimum of 24 hours for the mortar to fully cure.
Step 12: Prepare Workspace for Grouting
Materials and tools: sponge, bucket of water, and sponge
To cleanse the surface from dust and debris, gently wipe the backsplash with a barely damp sponge or cloth before applying grout.
If you didn’t cover the countertops with scrap cardboard in step 4, do so now to protect them from any falling grout.
Step 13: Prepare Grout
Materials and tools: bucket, grout, water, hammer drill with mixing attachment, respirator mask, and safety goggles
Before working with grout powder, put on a respirator mask and safety goggles.
Measure out the powder according to manufacturer’s instructions, and pour it into a clean bucket.
To eliminate the need for grout sealant, use a grout maximizer in place of water when preparing grout for application. The maximizer increases the grout’s resistance to stains and mold, and gets rid of the need for sealing after grout cures. Grout maximizer comes in two varieties: sanded and unsanded; choose the one that fits your grout type.
Measure out the required amount of grout maximizer, and add it to the bucket.
Set the hammer drill on the lowest setting for 3-5 minutes to mix the powder and water (or grout maximizer). Let the mixture stand for 5-10 minutes, then re-mix it for an additional 1-2 minutes before applying.
We recommend mixing enough grout to last approximately 30 minutes.
Grout consistency should be that of peanut butter. Adding too much water will make the grout too runny. Not enough water will result in a coarse mixture that is difficult to push into the grout lines.
Step 14: Apply Grout
Materials and tools: grout and rubber float
Using a margin trowel or scrap piece of wood, scoop grout from the bucket onto the rubber float.
Continue applying grout from multiple directions until all joints are completely filled.
Step 15: Wipe Away Excess Grout
Materials and tools: sponge and bucket of water
After approximately 15 minutes, use a barely damp sponge to wipe the excess grout from the surface of the tile.
If installing rectangular or square tile, wipe in a diagonal motion to avoid pulling out the mixture from the newly filled joints. If installing arabesque or other irregularly shaped tile, wipe in wide circular motions.
Rinse out the sponge in clean water as often as needed, but try to limit the amount of water you apply to the backsplash to avoid weakening the grout.
Step 16: Buff Away Haze
Materials and tools: sponge
After approximately 3 hours, use a damp sponge or cloth to buff away any leftover grout haze from the tile surface. Apply firm pressure to remove the last remains of haze and polish the tile. Remove all remaining painter's tape.
Allow 24 hours to 3 days for the grout to fully dry. Curing time depends on the humidity level at the project site, as well as manufacturer’s instructions.
Step 17: Prepare Silicone Caulk
Materials and tools: caulk gun, caulk, utility knife, and damp cloth
Silicone caulk is a waterproof, flexible material that is used to seal the gap between two different materials—in this case the tiled backsplash and the countertop. Its waterproof characteristic protects both materials from potential water damage and mold.
For consistency, we recommend matching the caulk color to the grout color. If you can't find matching caulk, opt for a similar but slightly lighter shade.
Before you begin, use a utility knife to cut the caulk nozzle at a 45-degree angle to a size that is appropriate for the needs of your project. For a thinner line of caulk, cut near the top; for a thicker line of caulk, cut further down.
Place caulk tube into caulking gun.
Step 18: Apply Silicone Caulk
To apply caulk, hold the caulking gun at a 45-degree angle, so that the tip of the nozzle is parallel to the countertop.
In case of a mistake, begin the application in the least-visible corner.
Apply a steady amount of pressure to dispense a thin, uniform line at the intersection of the backsplash and the countertop. If you make a mistake, immediately scrape out the freshly applied caulk, wipe away any residue, and try again.
Do not try to caulk the entire backsplash in one continuous application.
After you’ve applied a line that is approximately 2 feet long, use your finger to neatly smooth out the newly applied caulk. Special smoothing tools are available, but we recommend using your hands, as this will give you more control.
You want the line of caulk to not only completely seal the joint between tile and the countertop, but to also look neat, as it will be directly in everyone’s line of sight.
Continue applying caulk, stopping every 2-3 feet to smooth out the freshly applied line. Allow 24 hours for the caulk to fully cure. Once dry, reinstall appliances and switch covers.
