DIY Nail Polish Shelf
Easily create a shelf you can use anywhere in your home.
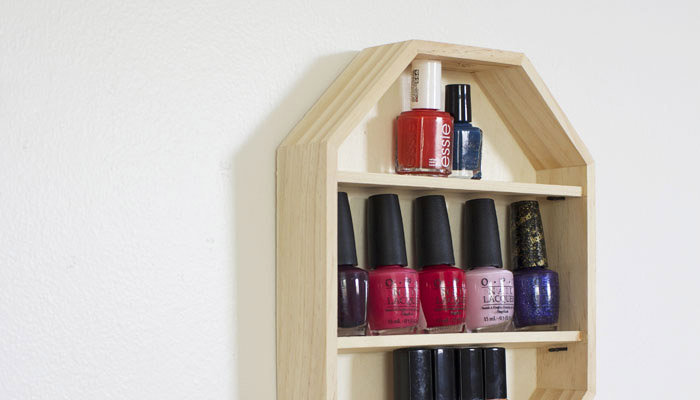
Photo: Aileen Allen
Here's a quick little DIY that you can whip up in about 20 minutes flat—a wall shelf to organize your nail polish or other small items! This idea is so simple and quite versatile, too. You can use any shape or size of tray, and you could add color with paint or patterned paper to give it a little more personality. I found my octagon tray at a craft store for under $10. I've seen trays at thrift stores quite often, too!
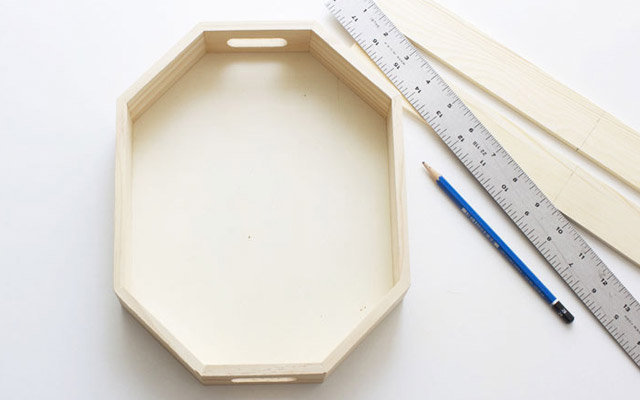
Photo: Aileen Allen
Supplies:
- Small wooden tray
- Two pieces of craft wood (for the shelves)
- Ruler
- Pencil
- Saw
- Double-pointed tacks
- Hammer
- Picture hanger
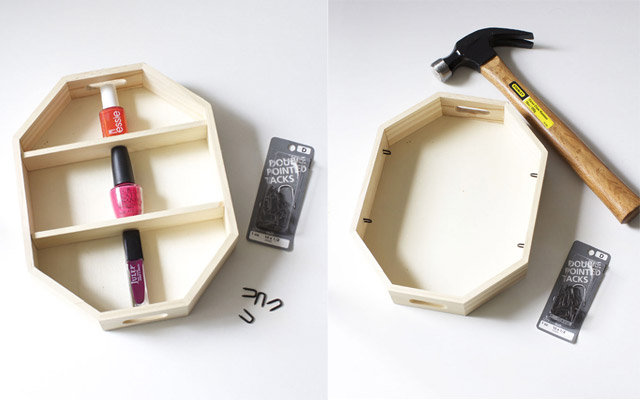
Photo: Aileen Allen
How to Make It:
Measure the two pieces of wood to fit exactly inside the tray.
Saw them down to size.
Slip the shelves inside the tray. Use one of each of your different types of nail polish (or any other trinkets you plan on displaying) to measure how high the shelves should be. Mark these spots with a pencil and take the shelves back out.
Hammer the double pointed tacks into the tray on the lines you've marked.
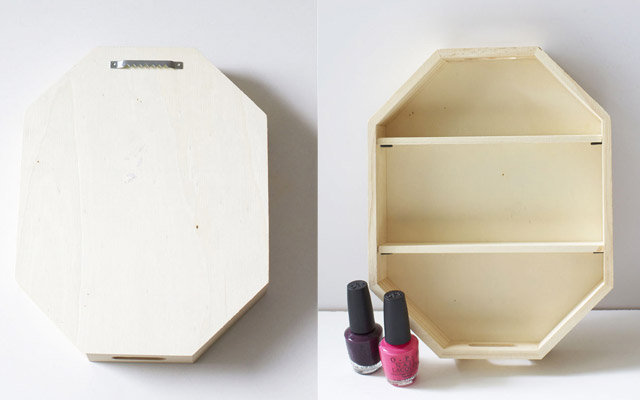
Photo: Aileen Allen
Flip the tray over and tack a picture hanger on the back. Make sure the tacks are short enough that they don't poke through to the front.
Now, you're ready to hang the shelf!
Photo: Aileen Allen
Fill your new wall shelf with nail polish, other small toiletries (like a collection of lipsticks, pretty soaps, small perfume bottles), or whatever little treasures you'd like to display.
I kept my shelf pretty simple, because I like the look of the natural wood (and because I'm lazy!), but you could also paint your trinket shelf or add wallpaper to the back. If you can find a mirrored tray, that would take the project to another level!
Tip!
This little shelf is great for kids' spaces too! Let them display their growing collections of seashells, rocks, or toy cars.
