Before After Spa Bathroom Rises from the Rubble
See how this dated bathroom goes from bland to grand.
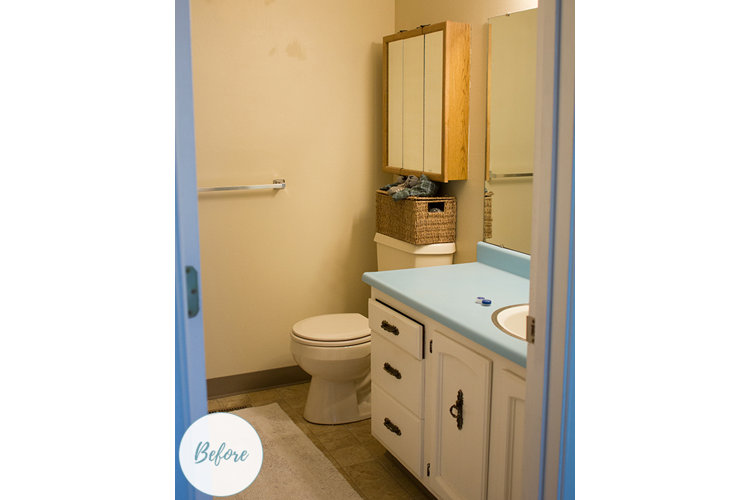
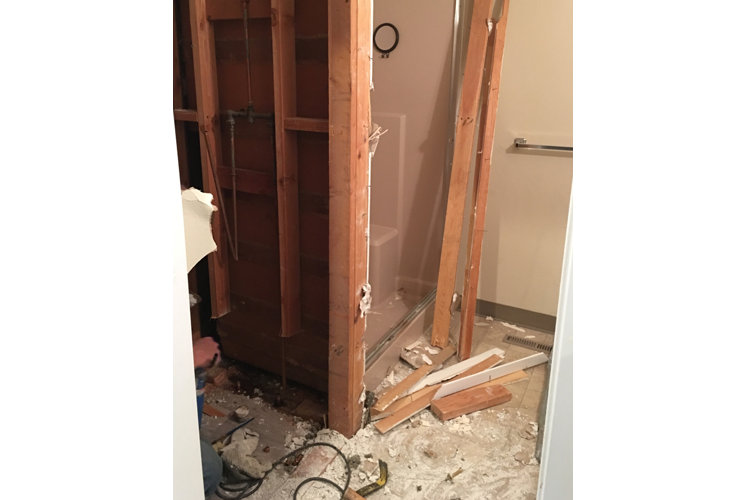
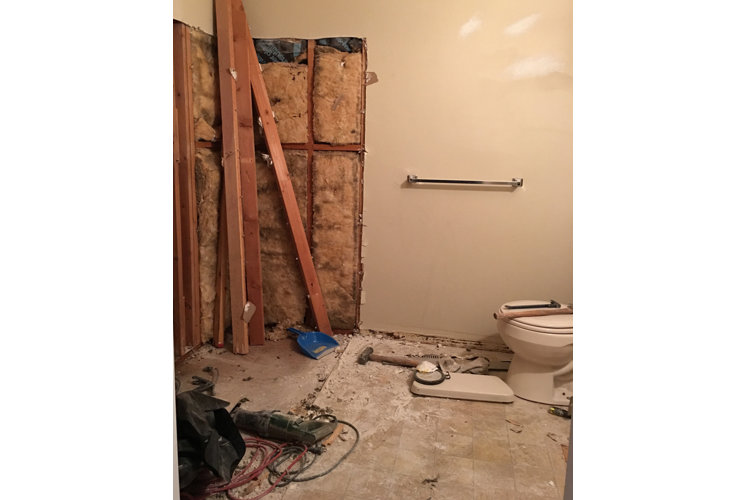
Though it may have taken longer than she had hoped, Jenna Sue, of Jenna Sue Design, had a plan from the start—the bathroom had to go. The result is an omm-inspiring, farmhouse-infused paradise for aching feet. Take a look below to see the process in action.
Why did you decide to renovate this space?
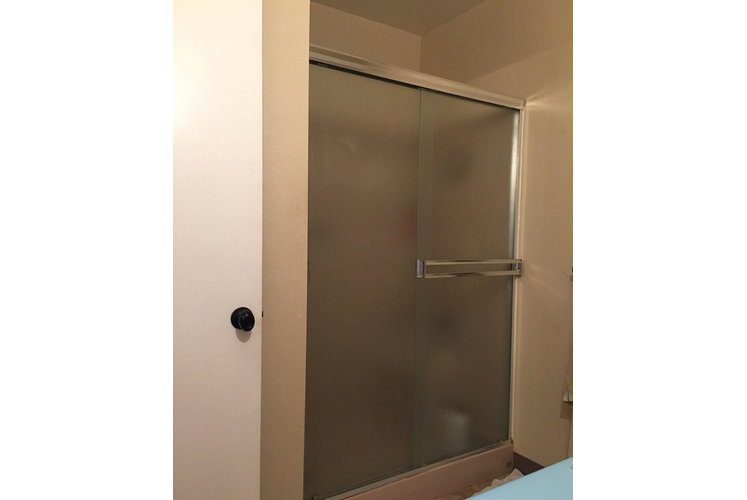
When I first bought the house, the master bathroom was one of the biggest drawbacks. I knew it had to be dealt with, but I put it on hold for over two years to remodel the rest of the home. The biggest problem was the lack of space, which I addressed by removing a large linen closet and keeping the shower area open with a single glass panel in lieu of a door.
Photo: Jenna Sue Design
What do you love most about your new bathroom?
The details. I’m partial to rooms inspired by nature, so I think the pebble floors really make the space, but I love the vintage feel of the vanity and sconce paired with the rustic wood and dark metals, softened by the textures of linen, shell and flowers. It’s such a calming atmosphere and the perfect extension of a cozy master bedroom.
Photo: Jenna Sue Design
How did you decide the style direction you went in?
I’d fallen in love with pebble tiles over a year ago after spotting them all over Pinterest, so I knew I’d make those the focal point and base the design around them. After remodeling my guest bathroom in a vintage-country style I wanted something different for the master, so I opted for a soothing, spa-like retreat. Using soft, neutral colors and textures allowed the river rock to ground the space and become the focal point.
Photo: Jenna Sue Design
Where did you splurge vs. save?
Hired labor is always the most expensive and took up the vast majority of my budget. At $11 a square foot the pebble tile also wasn’t the cheapest option, but it was absolutely worth every penny. I made up the costs by saving elsewhere, like converting a thrifted dresser into a vanity, purchasing a single shower panel instead of a door kit from a local glass company, sourcing my faucet and sink fixtures on eBay, adding DIY shiplap, and accessorizing the walls and shelves using items I had on hand already.
Photo: Jenna Sue Design
What was your biggest challenge?
I’ve learned over the years that detailed planning is essential. There will always be unexpected surprises, but you can eliminate much of it by sticking to a plan and schedule, and making sure each contractor is on the same page. I’ve become better at this so it’s rare that there are any major disasters, but there was some confusion on the fan/vent—I regret not spending more for a different model. There was also a measurement miscalculation, but I tend to be a perfectionist with things that others don’t notice.
Photo: Jenna Sue Design
What was it like living through the renovation?
I work from home, so constantly being around during the construction wasn’t the most fun. I also had to start using the downstairs bathroom which actually wasn’t as inconvenient as I thought it would be. Honestly, the house is always undergoing some form of renovation so I’m completely used to it at this point. Once you get past the dusty demolition phase, it’s not too bad.
