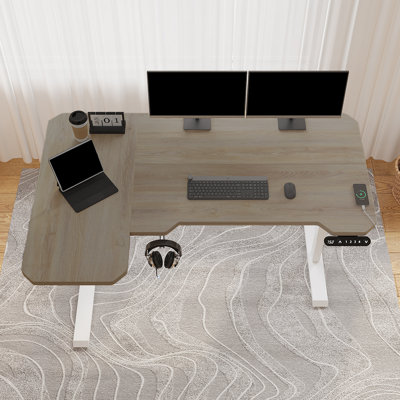
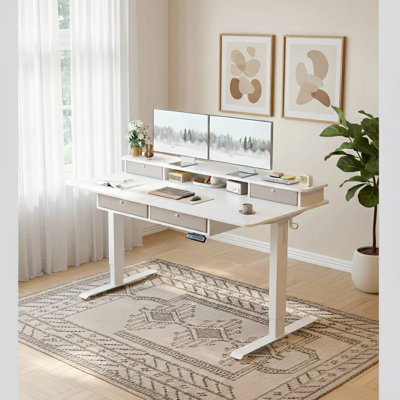
Triple motor L-shaped electric adjustable standing desk creates a workspace unique for you, which can effortlessly achieve the perfect sit/stand balance throughout your entire workday, using a sit/stand desk helps to counteract the negative health effects of a sedentary job.
So here’s the deal about the reversible L. When ordering this I was under the impression the short side L could be assembled on either side. The manufacturer provides the directions and subsequent guide holes to force the L (short side) on the right side of the desk, not the left. I specifically needed the L on the left so I had to get creative - if you want the L on the left side you’ll need a power drill with a drill bit to create your own guide holes for the screws ro the electronic rising control, as well as the under desk paper holder or whatever that white thing is (I didn’t attach it cuz didn’t want to deal with it and wasn’t important to me) - somewhere around step 6/7, the manufacturer provided directions specifically say to install a 4 holes straight piece with two screws in the furthest and adjacent hole, and has a big red X on where not to put the screws for this 4 holed part. If you read on, you’ll notice the desk continued to assemble in the directions to be specifically a right side L. I assumed the directions would provide a fork in the road where you can assemble either left or right L, but I was mistaken.
You’ll need to do the opposite of what the directions say for this 4 holed piece, and the dowels won’t fit but the brackets that hold the desk pieces together do, so just be sure to tighten those down strategically and the dowels won’t be necessary.
If you continue down the L on the left side path, things get a little confusing but with some mirror imaging you’ll be okay. Eventually you’ll get to attaching the electronic riser control, and the guide holes for that are only machined for a right side L, thus if you use those guide holes, the electronic riser control will be installed in the back of your desk. What you’ll need to do to remedy this is to use a drill bit, very carefully as not to drill too far into the wood, and create your own guide holes for the electronic riser control. This worked great for me, but won’t work if you’re not handy with a power drill as you run the risk of fracturing your desk while making the guide holes.
Thankfully me and my partner put our heads together and figured out how to orient the desk for the left sided L, the wood grain doesn’t align at the corner price, but you can barely tell. Looks and works as intended.
You assemble the desk upside down, so at the end you’ll have a fully assembled desk that needs to be flipped. This should be a two person job to avoid damaging the desk during the flip.
‘Initializing’ the disk orientation is a bit confusing but that’s provided in the directions. When it gets powered on (first time plugging in, changing outlets / unplugging at any point) you’ll need to reinitialize it. This can be done by holding the up and down buttons on the electronic riser control for 3 seconds and letting it reset, wait until the screen displays the current height, then it should be ready to go again.
Overall an easy assembly for a right hand side L, more technical for a left hand side L, but worth it if you want the desk and have moderate building skills/tools. Need two people to flip desk upright. Assembly took me roughly 3/4 hours in total over two days to assemble. But granted a lot of this time was spent undoing steps in order to get to the self assumed fork in the direction road to the pursue a left handed L.
For a left handed L, start diverging at the step with the big red X telling you what not to do, and do that red X direction exactly. Have a power drill to create guide holes for the electronic riser control, ditch the under table file holder to avoid creating more power drill assisted guide holes. Two people to flip is ideal, can still be challenging to flip in a tight space as the fully assembled desk is quite heading and awkward to flip.
If right hand L is desired and you’re good at following directions- 5 stars
If left hand L is desiree, gotta get a little creative - need a power drill with a drill bit to create new guide holes for electronic devices riser control, a measuring tape doesn’t hurt either. 3 stars due to seller provided instructions forcing a right hand L, which makes going for the left L more of a
Journey. Anonymous. Wed Nov 08 2023