With 25 years of experience, Sunjoy has established itself as a leader in the gazebo industry. We are proud to have sold over 10 million gazebos across North America, a testament to our dedication to innovation, quality, and customer satisfaction. Join the millions who have made Sunjoy a part of their outdoor lifestyle, and experience the quality and craftsmanship that define our brand.
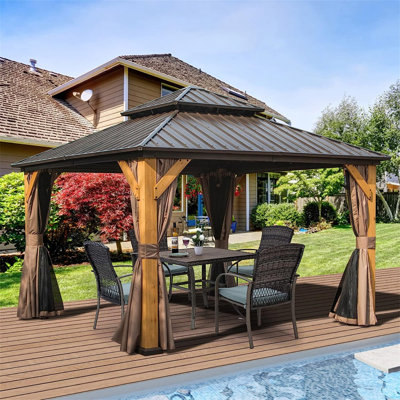
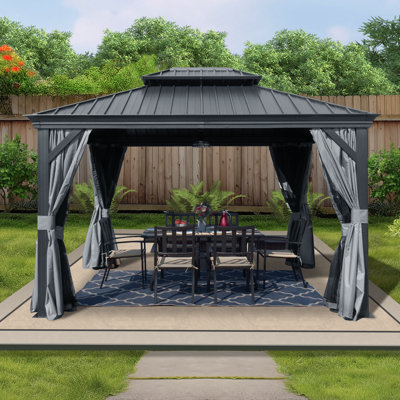
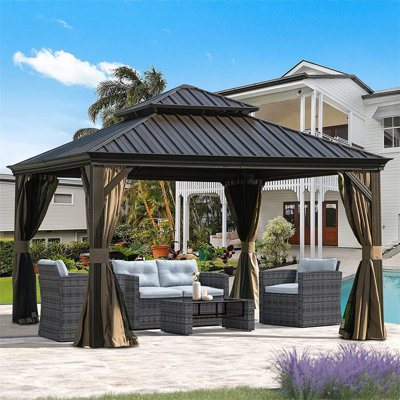
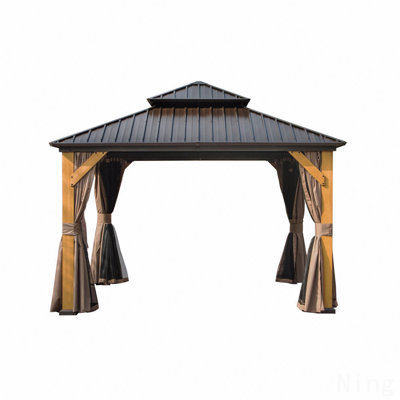
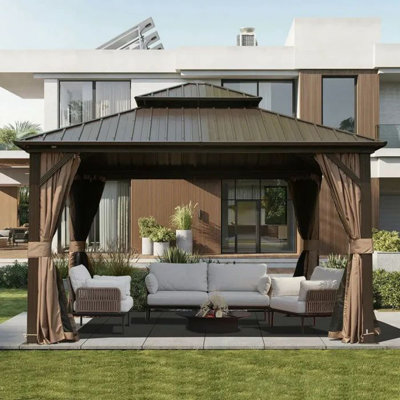
Add modern elegance and refined structure to your patio, deck, or backyard with the SUNJOY Kingston 12x12 Metal Gazebo featuring powder-coated grey aluminum posts. The understated grey finish delivers a versatile, sophisticated look while providing durable, rust-resistant performance.
Built to withstand year-round conditions, the galvanized steel roof handles heavy snow loads and wind with ease. Zippered privacy curtains and high-density mosquito netting enclose the space to provide complete shade and insect protection. The roof’s vented, double-tier design allows heat to escape while maintaining stability and style.
Assembly is streamlined with the insert-style roof panel system that requires fewer screws and enhances wind resistance. With a ceiling hook for custom lighting and pre-drilled anchor plates for secure setup, this gazebo makes outdoor comfort effortless and lasting.
I bought this somewhat hesitantly due to Wayfair's return policy, the amount and weight of all pieces, and the careful packing into 3 boxes. That would be hell to return, especially at my own cost. Nonetheless, I didn't return it and it is now full constructed.
First of all, I assembled this over the course of about 5 days, mostly by myself (which I understand is not advised by the instructions). I needed my neighbor's assistance and two kids to help me hoist the vented top portion of the structure onto the four posts.
Second, the instructions are clear about 75% of the time. There was a lot of trial and error with a few items, which I will list here:
1. Step 6 calls for D1, but does not clearly show which side is up. Flat side should be down.
2. In step 11, the aforementioned hoisting of the vented portion, it really doesn't appear that those 4 pieces of D1 will hold such a heavy piece, but it does.
3. In step 18, it calls for sliding the roof pieces into grooves without securing them, which happens in step 19. I HIGHLY ADVISE TO INSTALL THE ROOF PIECES ON ONE SIDE ONLY AND SECURE EACH IMMEDIATELY. As a matter of safety, these pieces are extremely sharp and some slid out of their grooves, crashing to the ground. Anyone standing below the unsecured roof pieces could've been severely cut/injured if one slid off. This happened a few times (slid off, not injuries) and it was terrifying. Again, having others assist here to hold them in place while someone secured them is important. Wind could also cause these to fall.
4. Some of the same pieces are slightly different in length and this may cause a few issues with some pieces fitting (for example, I had trouble with the Q pieces that secure the roof pieces).
5. Step 22 was very unclear to me. There are 2 tracks for the bug screen and the curtain, but which one goes on which track is up to you. I used the outside track for the curtain. Also, when installing each, ensure the zipper portions meet in the middle of each side (not at the posts). Don't install H9 until you have all of the curtains properly installed, or you'll have to remove those pieces to make adjustments.
6. Finally, also in step 22, H7, H8 and H10 are to be installed and it is not clear how or to what. 3 sets of each go on each post and attach to the eyelets of the bug screen and curtain to keep those from blowing. Photos of this have been added here.
All in all, we like this structure but the fabrication of the materials is far from exact and the instructions need to be improved.. Tim. Downey, CA. Sun Apr 05 2026