Mini Split Installation: A How-To Guide
How to install a mini split.

A mini split system is a compact and efficient way to cool or heat different rooms in your home at independent temperatures. A ductless mini split installation is a favorite among many home owners due to its straightforward installation that requires very little damage and alteration to your home. If you are DIY-savvy and plan to install yours, read this guide on how to install a mini split for step-by-step instructions.
In this guide:
What Is a Ductless Mini Split?
How to Install a Mini Split
Frequently Asked Questions
What Is a Ductless Mini Split?
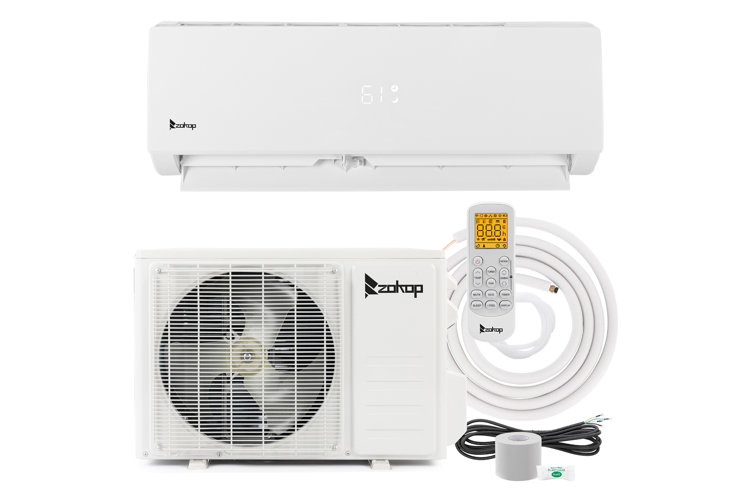
Simply put, a mini split system, is both a cooling and heating system in one that functions using heat pump technology. By installing a single outdoor condenser (designed to dissipate heat), it is possible to power multiple indoor evaporator systems that can cool or heat each room at independent temperatures. Unlike other traditional central air conditioning systems, you can install a ductless split A/C without any ducts, but rather through a line set that passes through a hole in the wall in order to carry cold refrigerant inside and hot refrigerant outside. This makes them the better option for homes without duct systems, as well as for locations where a duct may not reach, or anywhere you prefer not to install expensive and damaging ductwork. For more info on mini split system sizing, read What Is a Mini Split? For mini split installation guidance, read on.
How to Install a Mini Split
When it comes to mini split installation, keep in mind that instructions vary across different manufacturers, so be sure to read the supplied manual for specific wiring and installation details.
Safety Precautions
Before you begin your mini split installation, it is important to know this task will require the handling of refrigerant lines and making high-voltage electrical connections. It is for this reason that most home owners choose to have their mini split systems installed by a licensed professional (which is required by some states). While it is still possible to perform the majority of the installation yourself, we recommend that you bring in a professional to complete the setup, and the cutting and charging of the refrigerant line and connecting of power lines.
Tools & Materials
For a DIY mini split A/C installation, you will need the following:
- Drill
- Hole saw
- Adjustable/torque wrench
- Level
- Condenser wall brackets
- Ductless mini split system
- A plastic condenser pad for exterior unit to rest on – you can also pour your own concrete slab to create a level surface
- Plastic line set cover kit to contain all lines
Step 1: Choose the Right System
Before you begin shopping for your ductless split A/C, you need to make certain you choose the correct size for your space. All mini split systems use a unit of measurement called British Thermal Units (BTUs), which refers to the size of the cooling/heating capacity of the system. The higher the BTU, the greater the capacity. To start, you must calculate the square footage of your room so that you can choose a mini split system that is suitably for that space. Whether you select yours based on the size of the room or on BTUs, it is imperative that you choose a correctly sized ductless split A/C. One that is too small will not cool sufficiently, and one that is too large will turn on and off frequently to maintain the temperature – resulting in unnecessary wear and tear. Manufacturers usually give the necessary sizing guidance so you can choose the correct unit.
Step 2: Install the Indoor Unit
Once you have the correct unit, you can move onto your mini split installation.
Choose the Wall: Begin by selecting a wall in the room that you plan to heat/cool and make sure this wall leads to the outside to allow for the refrigerant and power lines to connect through.
- Make sure the wall you select has sufficient space to hold the air handler and is also free from any obstructions such as shelves or lights.
- The air handler should measure a minimum of 6 feet from the floor to the bottom of the unit. Be sure to follow manufacturer's guidelines for the roof clearance too.
- Ensure that the exterior wall is also free from obstructions as you will run lines from the indoors to the outdoor unit through this wall.
Tip!
Try not to install your indoor mini split system unit in direct sunlight or near a heat source, as this may impact the unit's ability to correctly monitor the interior temperatures and perform efficiently.
Locate the Studs: It's best to install the indoor air handler plate directly onto the wall studs, so make sure to locate them with a stud finder in the mounting location.
- Make certain the mounting hole locations on the mounting bracket align with the stud layout.
- You will also be drilling a 3 inch hole through the wall to the outside, so make sure the hole location avoids the stud.
- Additionally, you need to ensure there are no pipes, ducts, wires, or anything else in the wall that may cause an obstruction.
- You can then place the bracket for holding the wall unit against the wall and use a level to align it correctly. If the air handler is not level, the drain may not function properly.
- Mark those mounting points onto the wall and start by drilling pilot holes with a drill bit that is slightly smaller than the shaft of your intended screws.
Tip!
If you are battling to find the stud you can use wall anchors to secure the wall bracket in place, but be sure to check that they can handle the weight of the unit.
Drill the Holes: Drill a pilot hole in the wall for the (line set) refrigerant lines, drain tubing, and control lines. You can use the mounting bracket to mark this hole – typically on the lower left- or right-hand corner.
- The width of the hole is dependent on the lines provided but is usually around 2 – 3 inches.
- Some air handlers give you the choice of which side the lines will exit the unit but use manufacturers instructions to learn how to move them if need be.
- * Drill a hole the size of the hole saw's pilot bit, long enough to exit the exterior of the house at a slightly downward angle so that you will be able to align the larger hole you drill with the hole saw. Then, use the hole saw bit to drill the 2 or 3 inch hole, angling it downward slightly for better drainage.
- Line set holes must slope slightly downward to the outside so the condensate can drain outside.
- Check the exterior to ensure there are no obstructions – then you can drill a full-sized hole.
Connect with Wires: Connect the control wires and run the line set to your indoor unit according to manufacturer's instructions. Usually this involves the removal of the back plate in order to attach the wire by hand.
- Unfold and push the refrigerant line through the hole and use electric tape to keep the refrigerator pipe, control wire, and drainage tubing together with ease.
- Raise your indoor unit toward the mount and pull all the pipes, wires, and tubing through the hole. Then mount the unit securely using the provided hardware.
- Uncoil the line set from the back of evaporator and feed through the hole from outside (using an assistant here will help).
- Angle the line set downward and to the side to reach the condenser.
- Keep in mind the drain line is shortest of them all and goes through last – below the other lines.
Step 3: Install the Outdoor Unit
Once you have installed your indoor unit, you can move onto the outdoor condenser.
Choose the Location:Pick where you plan to install your outdoor condenser unit – whether this is on the ground, roof, or on an outside wall using mounting hardware. If you place it on the ground, you will need to secure it to a condenser pad which you can either purchase or make from concrete.
Connect Lines: Once you install the condenser, you can connect the pipes, wires, and tubes from the inside unit.
Tip!
If you are using a DIY kit that has pre-charged lines, you can install them yourself. It is imperative that you do not cut pre-charged lines yourself as this is extremely dangerous and can result in severe injury.
- Follow manufacturer's instructions to install your outdoor unit correctly and make sure to have an adjustable wrench and a torque wrench on hand before you start.
- If your kit needs the lines cut and charged, this is the point where you will need to bring a professional in.
Secure Wires:Securely attach the wires and tubing to the exterior wall and use a cover for a more streamlined look.
Complete the Installation:Connect the correct pipe joint to the line set on the back of the outdoor condenser unit. Then you can connect the multi-conductor wiring that runs from the indoor to the outdoor unit. This is where you will need a torque wrench.
Step 4: Follow Up With a Professional
Although this is a job you can do yourself, it is a good idea to call a professional to complete the final technical steps of your mini split installation. They will be able to ensure your connections are secure and handle all dangerous gases and such. It is also a good idea to get a licensed electrician to power the unit as you will need to run a line from the breaker panel to a disconnect switch and then from the switch to the unit.
Frequently Asked Questions
What tools are needed for DIY mini split installation?
You need a drill, hole saw, adjustable/torque wrench, level, condenser wall brackets, and a ductless mini split system.
Why should the indoor unit not be in direct sunlight?
Direct sunlight may impact the unit's ability to monitor temperatures and perform efficiently.
How should the line set holes be drilled?
Drill them at a slightly downward angle to the outside for proper drainage.
