
Backyard Discovery Verona 12' x 8' Cedar Wood Outdoor Cabana Corner Pergola with Privacy Panels
By Backyard Discovery
Rated 4.8 out of 5 stars.73 total votes
FREE Delivery
Define your backyard style with the Verona Cabana Pergola from Backyard Discovery, where style meets serenity. This innovative corner pergola carves out a private retreat perfect for relaxation or entertainment. Crafted with precision and care, this outdoor cabana boasts heavy-duty 100% cedar construction, ensuring durability and timeless beauty. Featuring robust composite panels that provide seclusion and shade, this patio pergola enhances any outdoor setting. From poolside retreats to intimate garden corners, the Verona adapts seamlessly to your space. Create a cozy fire pit enclosure, a sheltered yoga sanctuary, a peaceful reading nook, or let your imagination guide you to endless possibilities. Assembly is streamlined with pre-drilled, pre-stained, and pre-cut materials, while the BILT app provides step-by-step guidance throughout the process. The inviting light brown stain complements any outdoor setting, adding warmth and charm to your space. Backed by a 5-year warranty, you can trust in the quality and reliability of your investment. This versatile corner pergola creates an intimate retreat where quality craftsmanship meets timeless elegance, bringing new life to any area of your yard, patio, or deck. Create your dream backyard with the Verona Cabana Pergola and transform your space into a naturally beautiful sanctuary for years to come.
Love it! Installation was easy and it looks beautiful out in my yard. Just what I needed.. Nancy. Portland, ME. Mon May 18 2026
Backyard Discovery Tuscany Solid Wood Pergola (Bamboo/Pumice)
By Backyard Discovery
Rated 5 out of 5 stars.2 total votes
FREE Delivery
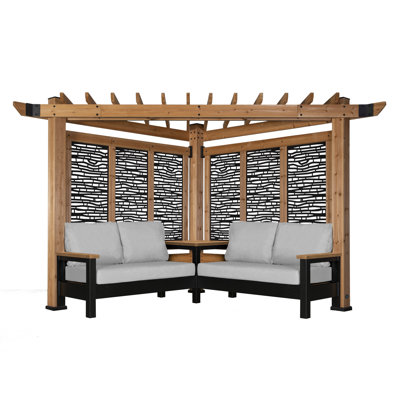
Backyard Discovery's Tuscany Cabana Pergola with built-in outdoor patio furniture is a unique backyard structure designed to create a private, shaded, and versatile aesthetic to your outdoor space. Whether relaxing or entertaining, the open concept design makes it a perfect choice for all yard or garden sizes, pools, fire pits, compact spaces, and corners. The Tuscany Cabana Pergola's stately composition is complete with light brown stained cedar wood and black powder-coated steel accent plates. The steel furniture frame is completely built-in for added strength and stability while the Sunbrella® fabric cushions add an ideal touch of modern quality and long-lasting comfort. The fixed patio table and armrests are built from exotic Meranti wood. Commonly chosen for its strength and durability in boatbuilding, Meranti offers uncommon beauty and allure that will impress. Make the Tuscany Cabana Pergola by Backyard Discovery your choice in exterior structures and give new life to your outdoor space with the perfect solution to all your open-air furniture needs.
Love. Love. Love. And you willl too!. Rhonda. Carneys Point, NJ. Thu Sep 18 2025

Tuscany 13 Ft. W x 9.5 Ft. D Solid Wood Pergola
By Backyard Discovery
Rated 5 out of 5 stars.1 total vote
FREE Delivery
Backyard Discovery's Tuscany Cabana Pergola with built-in outdoor patio furniture is a unique backyard structure designed to create a private, shaded, and versatile aesthetic for your outdoor space. Whether relaxing or entertaining, the open-concept design makes it a perfect choice for all yard or garden sizes, pools, fire pits, compact spaces, and corners. The Tuscany Cabana Pergola's stately composition is complete with light brown stained cedar wood and black powder-coated steel accent plates. The steel furniture frame is completely built-in for added strength and stability while the Sunbrella® fabric cushions add an ideal touch of modern quality and long-lasting comfort. The fixed patio table and armrests are built from exotic Meranti wood. Commonly chosen for its strength and durability in boatbuilding, Meranti offers uncommon beauty and allure that will impress. Make the Tuscany Cabana Pergola by Backyard Discovery your choice in exterior structures and give new life to your outdoor space with the perfect solution to all your open-air furniture needs.
I definitely shopped this particular pergola for pricing comparison which I suggest everyone does because there are many vendors who sell this product that differs in sales price. But, everything from the shipping condition of the boxes, the packing of the material (including the vacuum packed seat back cushions), the quality of the material, the instructions and hardware for each individual box, and the look after completing the installation was as expected. I have been in construction my entire life and am very handy, so I can anticipate what the overall installation would consist of, but there are a couple of areas in the installation instructions you have to watch out for especially when you get into your rhythm of the install. Step 6 - step 10, be sure that all respective joists pre-drilled hole side are turned up. For Step 12, I chose not to install the middle lag bolts on the left side and right side, two outer most joist because they aligned with the area of the beams that were overlapped which could create a split - the front and rear lags on those joist were still plenty of strength for the application. My last tip references the seating assembly - I permanently installed the Step 17, assembled the entirety of the seating area, leveled up the table (Step 18) and the sub frames (Step 20), I then fastened the table to the structure, and then permanently installed the seat supports (Step 22). The reason for installing the seating as I did is because there is a little bit of variance with squaring up the structure along with the spacing of the seat support, table, and sub frames that can affect how well the cushions fit in their areas. Overall, it was a great purchase, great price, and it looks even better in person than it does in pictures!. Anonymous. Las Vegas, NV. Tue Jul 23 2024
Backyard Discovery Verona Solid Wood Pergola (Pebble)
By Backyard Discovery
Rated 4.8 out of 5 stars.57 total votes
FREE Delivery
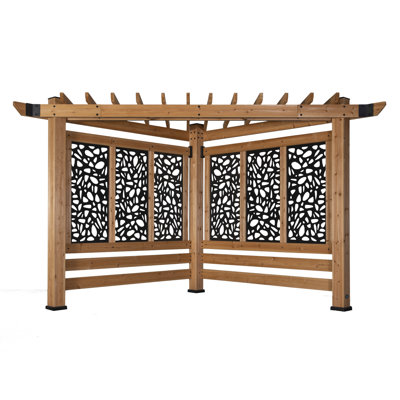
Pergola is a unique backyard structure designed to create a private, shaded, and versatile aesthetic for your outdoor space. Whether relaxing or entertaining, the open-concept design makes it a perfect choice for all yard or garden sizes, pools, fire pits, compact spaces, and corners. The pergola's stately composition is complete with light brown stained cedarwood and black powder-coated steel accent plates. Make the pergola your choice in exterior structures and give new life to your outdoor space with the perfect solution to all your open-air furniture needs.
This has added such visual appeal to our backyard ❤️ And it is beautiful wood and hardware A Great purchase. Julia. Murrieta, CA. Wed May 08 2024

Sonne 13 Ft. W x 9 Ft. D Solid Wood Pergola
By Home Loft Concepts
Rated 4.3 out of 5 stars.37 total votes
FREE Delivery
Transform your outdoor space with wonderfully aesthetic appeal while also utilizing its full potential. Beautifully crafted from rich acacia wood, our outstanding pergola showcases a strong and sturdy structure that not only upgrades your space with a dash of rustic charm but also offers a multitude of functions. The triangular design and open slat top allow you to tuck this accessory into a corner of your yard or patio to provide both refreshing shade and privacy for you and your family to enjoy.
This is a beautiful pergola in everyway. It is remarkably strong and exudes a rich feel. Because it is triangular, you have to measure very carefully.. Vicki. Thu May 21 2026
Jacobanthony 12.9 Ft. W x 9.6 Ft. D Solid Wood Pergola
By Arlmont & Co.
Rated 4.8 out of 5 stars.55 total votes
FREE Delivery
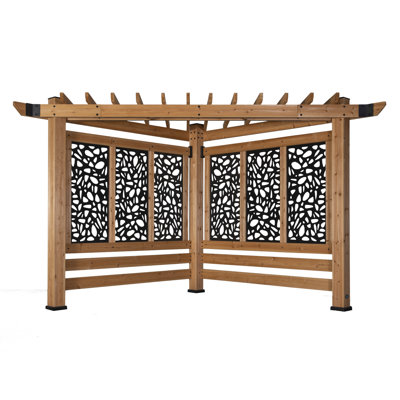
Pergola is a unique backyard structure designed to create a private, shaded, and versatile aesthetic for your outdoor space. Whether relaxing or entertaining, the open concept design makes it a perfect choice for all yard or garden sizes, pools, fire pits, compact spaces, and corners. The pergola’s stately composition is complete with light brown stained cedarwood and black powder-coated steel accent plates. Make the pergola your choice in exterior structures and give new life to your outdoor space with the perfect solution to all your open-air furniture needs.
Multiple knocks on our door lately folks asking where we got our pergola! It adds depth to our little backyard garden.. Cassandra. Minneapolis, MN. Sun Oct 16 2022