Hardware 101: How to Install a Door Knob
Easy steps for a quick upgrade.
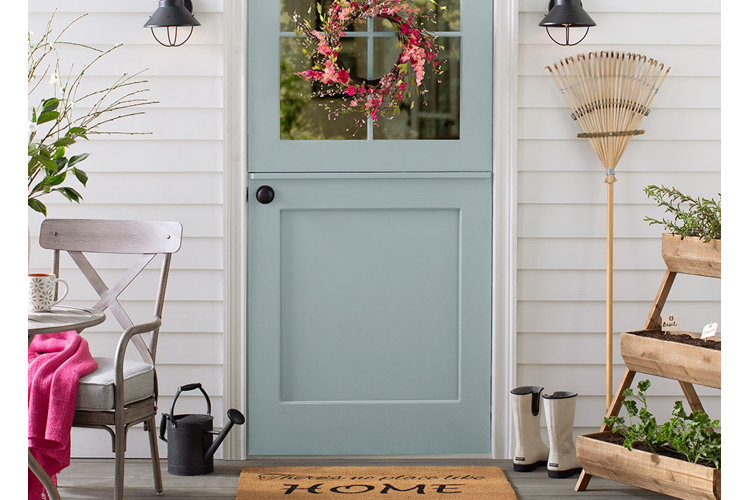
Installing a door knob is an easy DIY project that instantly makes your door more functional and polished. With a screwdriver and a few simple steps, you can replace an old knob, add a deadbolt, or install hardware on a brand-new door. Unsure where to start? This beginner-friendly guide walks you through every step, so you can install a door knob with confidence.
In This Guide:
How to Install a Door Knob
How to Install a Deadbolt
Installing on a Slab Door (Starting From Scratch)
Frequently Asked Questions
How to Install a Door Knob
Replacing an existing door knob is simple. Follow these instructions to make the door knob installation process easy.
What You’ll Need
- Screwdriver
- Door knob kit (knob set, latch plate, and strike plate)
Step 1: Understand the Parts of a Door Knob
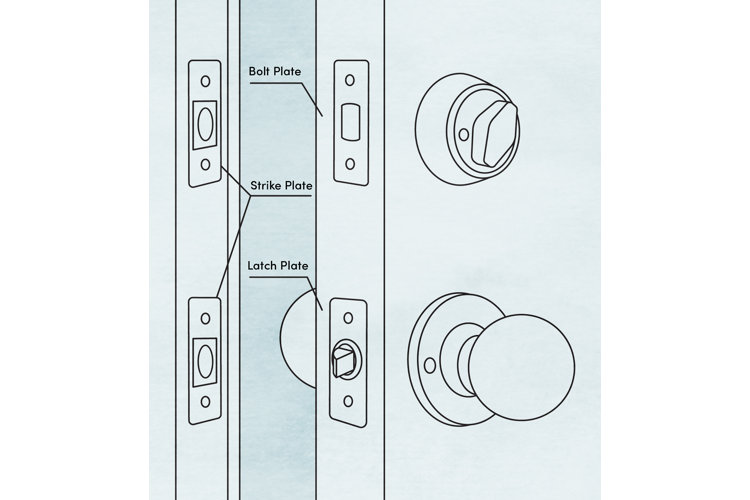
Before diving into door knob installation, it helps to understand the main parts of a door knob set.
- Latch Plate: The metal plate attached to the latch that fits into the door’s edge
- Spindle: The rod that connects the interior and exterior knobs through the latch
- Strike Plate: The plate mounted to the door jamb that catches the latch when the door closes
- Bore Hole: The main circular hole in the door where the knob sits
Step 2: Install the Latch Plate
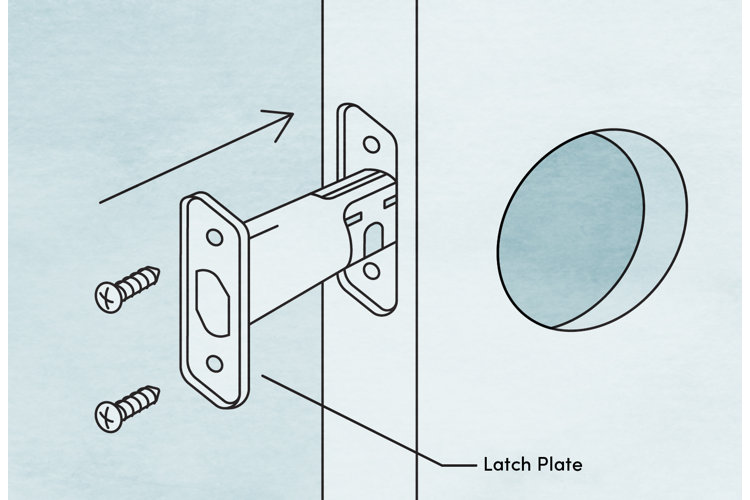
Insert the latch plate into the hole on the edge of the door. Make sure the tapered side of the latch faces the door frame so it can move smoothly when closing. Then, use your screwdriver to fasten the latch plate with the included screws.
Step 3: Install the Exterior Knob
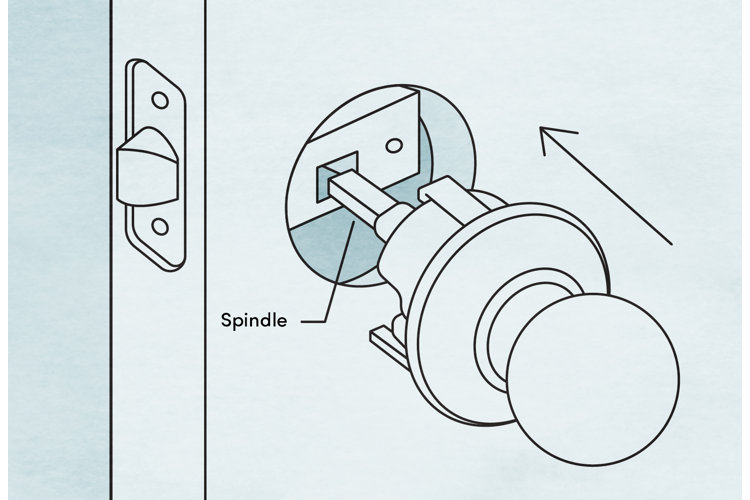
Take the exterior knob (the side with the spindle). Align it with the bore hole, and carefully slide the spindle through the center latch that you installed in the previous step. Press the knob flush against the door.
Step 4: Install the Interior Knob
On the inside of the door, line up the interior knob with the spindle that’s sticking through. Hold both knobs tightly against the door, then use your screwdriver to secure the interior knob with screws.
Step 5: Attach the Strike Plate
Place the strike plate on the door jamb where the latch meets the frame, then use your screwdriver to secure it with screws. Close the door and test the knob, ensuring it turns and latches smoothly.
Tip!
Wondering how to install an electronic or keyless entry lock? Our guide to Keyless Entry Installation covers everything you need to know.
How to Install a Deadbolt
Deadbolts provide extra security, and follow a very similar installation process to door knobs.
What You'll Need
- Screwdriver
- Deadbolt kit (deadbolt, bolt plate, and strike plate)
Step 1: Install the Bolt Plate
Insert the deadbolt into the edge bore hole with the tapered side facing the door frame. Use your screwdriver to screw the bolt plate into place.
Step 2: Install the Exterior Face
Line up the exterior portion of the deadbolt with the bore hole. Insert the spindle through the center of the bolt mechanism.
Step 3: Attach the Interior Plate
Place the interior plate (or the full knob/lever mechanism) onto the inside of the door, aligning it with the spindle. Then, secure it with screws. If your deadbolt includes both an interior mounting plate and a decorative cover, screw on the mounting plate first, then snap on the decorative plate.
Step 4: Install the Strike Plate
Secure the strike plate into the door jamb. Test the deadbolt by turning it several times to make sure it locks and unlocks smoothly.
Installing On a Slab Door (Starting From Scratch)
If you’re working with a slab door (a plain door without pre-cut holes), you’ll need to drill your own openings before adding a knob or deadbolt.
What You’ll Need
- Pencil
- Drill with hole saw
- Drill guide or jig
- Spade bit sized to match latch width
- Wood chisel
- Safety glasses and gloves
Step 1: Mark the Measurements
Using a drill guide, mark the location of the bore hole at the correct backset distance (typically 2 3/8 or 2 3/4 inches from the door edge). If you’re also adding a deadbolt, mark a second hole 6 to 8 inches above the knob hole.
Step 2: Drill the Bore Hole
Put on safety glasses and gloves. Attach the hole saw to your drill and cut halfway through the door from one side. Then, finish the cut from the other side to prevent splintering.
Step 3: Drill the Edge Bore Hole
If you have a drill jig (a guide that keeps your drill steady), attach it now. Then, use a spade bit (a flat wood-boring drill bit) the same width as your latch to drill the latch hole in the edge of the door. Place the latch in the hole, trace around the plate, then remove it. Carefully chisel a shallow recess so the plate will sit flush with the door.
Step 4: Install & Test Your Hardware
Next, follow the steps for installing a door knob or deadbolt above. Test the knob and lock several times to make sure everything properly aligns and works smoothly.
Frequently Asked Questions
What tools are needed to install a door knob?
You'll need a screwdriver and a door knob kit, which includes a knob set, latch plate, and strike plate.
How do I install a latch plate on a door?
Insert the latch plate into the door's edge hole, ensure the tapered side faces the frame, and fasten with screws.
What should I do if I'm installing on a slab door?
Mark the bore hole measurements and drill the necessary holes. Then follow the door knob or deadbolt installation steps.
