How to Install a Ceiling Fan: Step-by-Step Guide
Bring the breeze indoors.
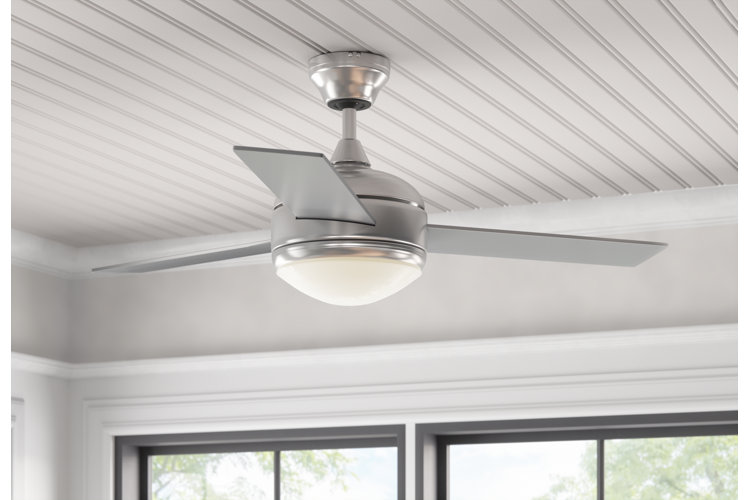
A ceiling fan is an easy way to cool down your home. Whether you're replacing an old fan or installing a new one, knowing how to install a ceiling fan can come in handy. Follow our step-by-step ceiling fan installation guide to get started.
Before You Begin: Safety & Tools
Shut Off Power & Confirm With a Voltage Tester
Working with electrical wiring requires safety first. Before touching any existing fixtures or wiring, you must make sure the electricity is completely disconnected.
- Step 1: Turn Off Power at the Breaker: Locate your home’s main circuit breaker panel and switch off the breaker controlling the room where you are installing the fan.
- Step 2: Test Wall Switches: Flip the room’s light switch or fan switch on and off to verify that power isn't flowing to the fixture.
- Step 3: Verify with a Voltage Tester: Remove the wall plate or carefully lower the canopy of your existing light fixture to access the wires. Touch a non-contact voltage tester to each wire connected to the outlet box. If the tester lights up or beeps, power is still active – go back to your breaker box and turn off the correct breaker until the tester confirms no power is present.
Check Joist Support & Fan-Rated Box
Ceiling fans are heavy and cause continuous vibration, so they cannot be hung from a standard plastic or lightweight light fixture box. You must ensure your mounting setup is rated specifically for fan support.
- Step 1: Inspect the Electrical Box: Check the metal or plastic outlet box in your ceiling. Look for a label inside that clearly states "UL Listed for Fan Support" along with its weight rating (typically up to 35 lbs. or 70 lbs). If it doesn't specify fan support, it must be replaced.
- Step 2: Check for Ceiling Joist Connection: A fan-rated box must be anchored directly to a ceiling joist or supported by an adjustable metal brace mounted between two joists. Never attach a fan box to drywall or plaster alone.
- Step 3: Install a Fan-Rated Support Brace (If Needed): If your current box isn't fan-rated or isn't attached to a joist, remove it. Insert an expandable ceiling fan brace through the hole in the ceiling and twist the bar until its metal teeth anchor securely into the wooden joists on either side. Attach a new fan-rated metal box to the brace following the manufacturer's instructions before mounting your fan bracket.
Tools & Materials for Ceiling Fan Installation
| Item | Required? | Why it matters | Quick tip |
|---|---|---|---|
| Voltage tester | Required | Confirms no live current | Test before touching wires |
| Screwdriver set | Required | Mount and canopy assembly | Use magnetized bits |
| Wire connectors | Required | Secure wire splices | Match gauge sizes |
| Ladder | Required | Safe overhead access | Keep a spotter nearby |
Proper Ceiling Fan Placement
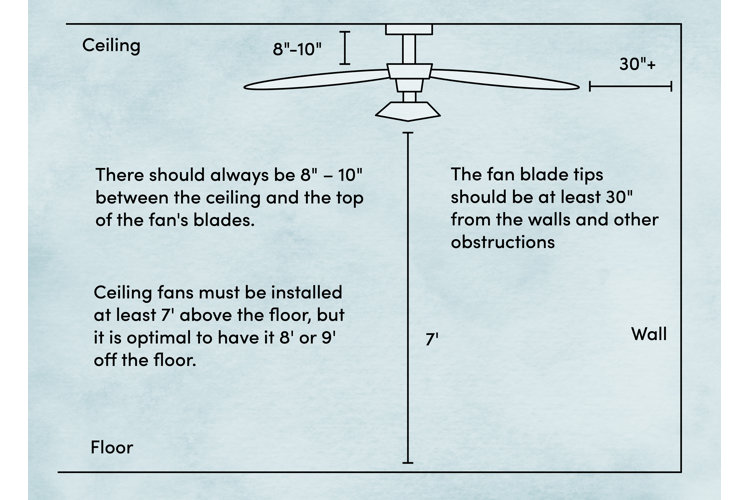
To prep for your ceiling fan installation, you'll also need to decide where to install the fan. Use the guidelines below to determine the best placement:
- Ceiling fans must be installed at least 7' above the floor, but 8' or 9' off the floor is more ideal.
- There should always be 8" – 10" between the ceiling and the fan's blades.
- The fan blade tips should be at least 30 inches from the walls and other obstructions.
How to Install a Ceiling Fan on a Flat Ceiling
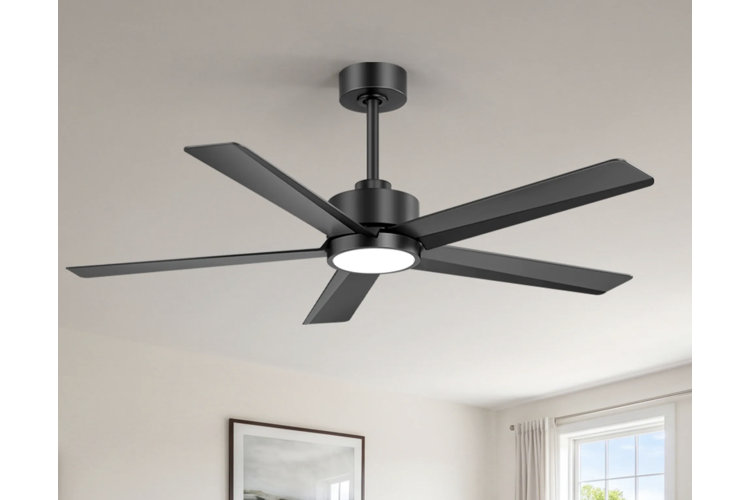
Step 1: Turn off Electricity & Confirm Power Is Off
Turn off the electricity at your main breaker panel for the room where you are installing the ceiling fan. Confirm the power is off by flicking the wall light switch. Then, remove the wall plate or existing light canopy and test every wire with a non-contact voltage tester to ensure no active current is present before touching any wiring.
Step 2: Remove Old Fan or Fixture
With a screwdriver, remove the blades of the existing fan if applicable to make it lighter. Unscrew the canopy cover at the ceiling, remove the wire nuts, and disconnect the house wiring from the fixture. Have a second person help support the weight as you unhook the unit from its bracket and set it aside.
Step 3: Check Joist Support & Set Up Fan Box & Mounting Bracket
Ceiling fans require a UL-listed, fan-rated outlet box that can handle continuous weight and vibration. Inspect your ceiling box to verify it is rated for ceiling fans and anchored directly to a joist (or an adjustable metal joist brace). If it isn't, replace it with a fan-rated box and brace system. Next, attach the new mounting bracket provided with your fan kit directly to the electrical box using the included mounting screws, pulling the house wires through the center opening.
Step 4: Buy a Downrod if Necessary
If the ceiling fan sits too close to the ceiling, it will not circulate air properly. Make sure the fan blades sit at least 10" from the ceiling and 7' to 9' above the floor. Use an extended downrod if your ceiling height exceeds 8'.
Step 5: Assemble Fan Core & Downrod
Following the manufacturer's instructions, thread the electrical wires from the fan motor through the downrod. Insert the downrod into the top of the motor housing, line up the hitch pin holes, and lock it in place with the clevis pin and cotter pin. Tighten any set screws securely.
Step 6: Hang the Fan Motor
Lift the assembled fan motor and insert the downrod ball into the ceiling mounting bracket. Rotate the ball until the groove on the ball aligns with the tab on the bracket, locking it into place. This allows the fan to hang hands-free while you complete the wiring.
Step 7: Make Wiring Connections (Hot, Neutral, Ground)
Connect the house wiring to the fan wiring using the included wire nuts:
- Ground: Connect the bare copper or green house wire to the green ground wires on both the mounting bracket and downrod ball.
- Neutral: Connect the white house wire to the white wire from the fan (or remote receiver).
- Hot (Power): Connect the black house wire to the black fan wire (motor power). If your fan has a separate blue wire for a light kit and you are using a single wall switch, twist the black and blue wires together and connect them to the black house wire. If you have a second wall switch (a red wire), connect the blue wire directly to the red house wire to control the light separately.
Tuck the wire connections neatly back inside the electrical box, then raise and secure the canopy cover over the mounting bracket.
Step 8: Attach Blades & Light Kit Assembly
Fasten each blade arm to the fan blades using the provided screws and rubber washers. Mount the assembled blade arms directly to the fan motor housing. Next, if your fan includes a light kit, connect its wire harness plug to the bottom of the motor housing, mount the light kit plate, and screw in the bulbs or attach the glass shade casing.
How to Install on a Sloped Ceiling
Step 1: Determine the Slope of Your Ceiling
Before purchasing or assembling parts, determine your ceiling's pitch using the steps outlined below. If your ceiling slope is greater than 30°, you will need to purchase an angled mounting kit and an extended downrod separately to ensure proper blade clearance.
- Measure Ceiling & Wall Heights: Measure the tallest point of your ceiling (mark the floor spot below it with painter's tape), then measure the wall height from floor to ceiling.
- Calculate the Ceiling Rise: Subtract the wall height from the peak ceiling height to find your rise.
- Measure the Ceiling Run: Measure along the floor from your tape mark to the adjacent wall to find your run.
- Draw a Scale Diagram: Convert your feet measurements to inches for a smaller scale. On paper, draw a 90° right triangle using the run as the base and the rise as the vertical side, then draw the hypotenuse to connect them.
- Measure the Pitch: Place a protractor where the horizontal base meets the hypotenuse (sloped line). Read the angle to find your ceiling's slope degree.
Step 2: Assemble the Ball & Downrod
Thread the ceiling fan's electrical wires through the downrod. Screw the downrod into the threaded end of the pivot ball (the ball allows the downrod to hang straight down regardless of the ceiling angle). Slide the ball and downrod assembly onto the top of the motor housing, insert the hitch pin through the alignment holes to lock it in place, and tighten any locking set screws.
Step 3: Install the Angled Mounting Bracket
Attach the angled mounting bracket (or standard bracket, if your pitch is under 30°) to your ceiling's fan-rated electrical box. Make sure the bracket is firmly anchored to a ceiling joist or support brace so it can handle the weight and angle of the hanging fan.
Step 4: Hang the Fan
Lift the fan assembly and set the downrod's pivot ball into the ceiling mounting bracket. Rotate the ball until the groove aligns with the bracket’s internal tab – this locks the ball in place and lets the fan hang plumb (straight down) while keeping your hands free for wiring.
Step 5: Connect Wires & Secure the Canopy
Connect the wiring (hot to hot, neutral to neutral, and ground to ground) using wire nuts, ensuring the wire connections fit neatly inside the electrical box or receiver housing. Slide the decorative canopy up the downrod to cover the mounting bracket and electrical box, then tighten the canopy screws to secure it against the sloped ceiling.
Ceiling Fan Parts & Wiring Tips
Ceiling Fan Wiring Color Map
| Wire color | Role | Connects to | Safety note |
|---|---|---|---|
| Black | Hot | Fan black lead | Breaker off first |
| White | Neutral | Fan white lead | Keep neutral isolated |
| Green/Bare | Ground | Ground screw/wire | Required for safety |
| Blue (if present) | Light kit hot | Switch or fan control | Verify manual mapping |
Neighborly Tip!
Make sure you have the right fixtures before beginning a DIY installation. For more tips on buying ceiling fans and lights, read our related articles:
- Ceiling Fan Buying Guide
- Types of Ceiling Lights: How to Choose the Right One
- How to Install a Ceiling Light
Frequently Asked Questions
Can I install a ceiling fan myself?
Yes, if you have a fan-rated electrical box, can safely shut off power, and can follow wiring instructions. Hire a licensed electrician if wiring is unclear.
What wires connect to a ceiling fan?
Typical wiring is black to hot, white to neutral, and green/bare to ground. Some fans include a blue lead for the light kit.
Can I install a fan on a sloped ceiling?
Yes, with the right downrod and sometimes a sloped-ceiling adapter. Follow manufacturer angle and clearance guidance.
You Might Also Like
