How to Install a Bathroom Sink
It doesn’t take a pro!
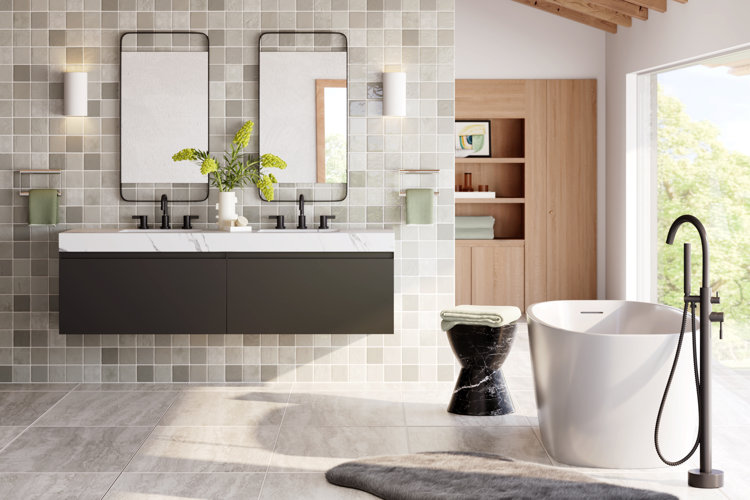
If you’re renovating your bathroom, knowing how to install or replace a bathroom sink yourself can be empowering as well as cost-effective. Our guide on how to install a bathroom sink is here to help you. Read on for information on how to measure for a new bathroom sink and all the materials, tools, and required components you’ll need to complete the installation.
In this guide:
Before You Begin
How to Install a Bathroom Sink
How to Remove an Old Sink
How to Install Bathroom Sink Hardware
How to Connect a Bathroom Sink to Your Plumbing
Test It Out
Frequently Asked Questions
Before You Begin

Understand Sink Installation Types, Sizes, & Styles
Before you begin, it is important to understand the installation type of the sink you’ve chosen because all bathroom sinks don’t install the same way. For tips on choosing a bathroom sink and details about the different bathroom sink styles, check out our guide on Types of Bathroom Sinks.
Make Sure It Fits
To make this project easier, we recommend using the existing plumbing in your bathroom for your new sink. If you want to move your sink to a different location, we recommend hiring a professional. Check out our guide on Buying a Bathroom Sink? Here's Exactly What to Measure to determine how to measure for a new sink.
If you’re planning on replacing your old bathroom sink with a new one of the same style, simply use the same width, length, and depth measurements for reference when purchasing. Width refers to the measurement from the front of the sink to the back of the sink, length refers to the measurement across the sink from left to right, and depth refers to the measurement from the top of the sink basin to the bottom of the sink basin.
If you want to size up or down in length or width, you will either have to widen your vanity countertop’s existing cutout or purchase a new countertop with the right size cutout. This will require a professional’s help.
If you’re working with a vessel sink, just make sure to choose a faucet that will fit over the height of the sink. Also keep in mind the heights of surrounding cabinetry, mirrors, and light fixtures so the sink will fit on your vanity.
For wall-mounted, pedestal, console, and corner sinks, be sure to measure the length of the wall you’d like to mount the sink on and ensure you have enough room between other fixtures for the sink. If the bathroom or closet doors open near where you’d like to position your sink, make sure they have full swing clearance.
Know the Parts of a Bathroom Sink
Though most bathroom sink types look and install differently, they all have the same basic anatomy. Refer to the following diagram of the parts and plumbing of a bathroom sink and drain for help while you install.
What You’ll Need
- All appropriate sink and sink plumbing components for your sink style
- Bucket
- Adjustable wrench
- Pliers
- Utility knife
- Chisel
- Power drill
- Hacksaw or other pipe cutter
- Pipe thread sealant or plumber’s tape
- Plumber’s putty
- A friend to help lift the sink
Tip!
If you have a granite or marble countertop, make sure you are not using oil-based plumber’s putty – it will bleach your countertop.
How to Remove an Old Sink
If you want to learn how to replace a bathroom sink, these steps will get you started. If you’re starting from scratch, skip to the next section.
Step 1: Disconnect the water supply.
Place a bucket beneath your sink setup and use the two shut-off valves below or behind the sink to turn off the water to your sink. Test both faucet handles to ensure water is shut off.
Step 2: Disconnect the hot and cold water supply lines.
Using an adjustable wrench, loosen the nuts holding the hot and cold water supply lines to the shut-off valves until you can remove them. Some residual water might drip out of them – that’s what the bucket is for.
Step 3: Disconnect the drain connection.
Use pliers to loosen the large slip nut holding the P trap to the tailpipe of your sink’s drain until it’s loose enough to remove easily. You can remove the entire trap assembly by loosening the large nut holding the trap assembly to the waste pipe in your wall, but that might not be necessary if you’re replacing the sink.
Step 4: Remove clips or bolts.
If your sink is installed on a vanity, use your power drill to unscrew the clips holding the sink to the underside of the countertop. If your sink is wall-mounted, pedestal, console, or corner style, remove the bolts holding the basin to the wall. You might need a friend to hold the sink for you while you do this so that it doesn’t fall.
Step 5: Remove caulk or sealant.
Run your utility knife along the crease between your sink and the countertop or wall to release the silicone sealant.
Step 6: Remove the sink.
Lift up the basin to remove it from a countertop. If your sink has a pedestal or console attachment, remove that after you take off the basin.
How to Install Bathroom Sink Hardware
If your countertop sink is installed independently of the faucet and faucet handles (all vessel and some undermount, drop-in, and trough styles do), install the faucet and faucet handles first. If your faucet and handles must be installed into holes in your sink basin, skip to the next step and do this one afterwards.
Step 1: Install the faucet spout.
If your faucet didn’t come with a gasket, wrap a ¼” – ½” thick ring of plumber’s putty around the underside of the faucet where it will meet the sink or countertop. Lower it into the appropriate installation hole and secure it in place by tightening a nut or plate beneath the sink or countertop with a wrench or drill. Remove any excess putty.
Step 2: Install the handles.
If separate from the spout, install the faucet handles the same way you installed the spout.
Step 3: Connect the faucet supply hoses.
Wrap plumber’s tape around or apply pipe thread sealant to the threads (grooves) of the supply line hose mounts under each faucet handle. Attach a flexible supply line hose to each of those mounts and tighten using a wrench on each corresponding nut. Using the same method, attach the other end of each supply line hose to the corresponding side of the T-shaped supply line mount on the underside of the spout.
Step 4: Connect the hot and cold water supply lines.
Attach a water supply hose to each water supply mount under each faucet handle using plumber’s tape or pipe thread sealant, a wrench, and the applicable nut. The water supply hoses will be thicker than the faucet supply line hoses, and will eventually be connected to the water supply valves in your wall.
Now that you've removed your old sink and prepped your supplies, it's time to install! Follow these steps for installing a bathroom sink like pro.
Step 1: Drill holes in the underside of your countertop.
First, you'll need to drill holes in the underside of the bathroom countertop for clip screws if your countertop doesn’t already have them. Clips are used for undermount and drop-in styles. You’ll usually need four, positioned at the corners of a rectangular mount or equidistant around a round mount. Make sure you use the right size drill bit for the clip screws you’re using.
Step 2: Apply sealant to the sink.
Squeeze a thin line of silicone caulk to the edge or edges of the sink that will be adhered to the wall or countertop.
Step 3: Mount the sink on the countertop or wall.
If your sink is drop-in, vessel, or trough, simply lower your sink and its hardware in position onto the countertop. If your sink is undermount, you’ll have to mount your sink from below. For wall mounts, ensure that the sink is level before you move on to the next step.
Step 4: Secure the sink in place using clips or bolts.
For countertop-mounted sinks, place clips and clip screws into the corresponding holes in the countertop and tighten until your sink feels snug in place. For wall-mounted sinks, drill the sink basin into the wall using lag screws into the sink’s mounting holes. You might want a friend to help you so that the sink doesn’t fall. Clean up any excess silicone after tightening.
Tip!
If you’re also installing a new countertop to go with your new sink, you can do all of these installation steps with the countertop upside-down – this is great for visibility and excellent if you’re installing an undermount sink.
How to Connect a Bathroom Sink to Your Plumbing
Once you have your sink securely in place, it's time to hook everything up. Here's how to connect your newly installed bathroom sink to under-sink plumbing components for the best results.
Step 1: Connect the hot and cold water supply lines to the shut-off valves.
Apply plumber’s tape or pipe thread sealant to the male pipe threads and screw the hot and cold water supply lines to the corresponding valves on your wall using compression nuts and brass ferrules.
Step 2: Install the lift rod.
Lower the lift rod into the top of the faucet and attach the clevis strap to the bottom of it using the clevis screw.
Step 3: Install the pop-up flange.
Wrap some plumber’s caulk or putty around the underside of the flange, or strainer, and press it gently into the drain opening of the sink. From below the sink, push the gasket onto the bottom of the strainer and then secure it in place with a washer and the lock nut. Tighten using a wrench, but don’t tighten too much or else the sink might crack.
Step 4: Install the tailpiece mount.
Place a gasket into the top of the tailpiece mount (the T-shaped piece with the side opening) and screw it in place using a wrench. The side opening of the tailpiece should be perpendicular with the dangling clevis strap. Adjust if not.
Step 5: Install the P trap assembly, if you removed it.
Connect it to the waste pipe in your wall and tighten using a wrench on the applicable nuts and washers.
Step 6: Install the tailpiece.
The tailpiece should fit snugly between the tailpiece mount and the P trap – if it’s too long, you may have to use a pipe cutter to shorten it. You may need to loosen the P trap and move it aside to fit the tailpiece under the tailpiece mount. Once it’s positioned correctly, apply some plumber’s tape or pipe thread sealant to the grooves on the tailpiece, screw it in place, and secure it with the accompanying nut and gasket.
Step 7: Install the pop-up stopper.
Lower the pop-up stopper into the bottom of the sink.
Step 8: Install the pivot rod.
Fit the pivot rod ball-first through the side opening in the tailpiece mount. Thread one side of the spring clip, the clevis strap in its natural position (not too far up or down), and then the other side of the spring clip onto the pivot rod. Secure the pivot rod into place with the pivot nut and accompanying gasket.
After you've installed your bathroom sink and attached it to plumbing components, you can complete the installation process. Here's how to get things up and running:
Step 1: Turn on the water supply.
Twist the hot and cold water valves in the opposite direction from the one used to shut off the valves (if clockwise to turn them off, counterclockwise to turn them back on) to resupply water to the bathroom sink faucet.
Step 2: Test the hot and cold water.
Check that each handle works and there are no leaks. If there are, you might need to disconnect the water again and re-seal some plumbing connections.
Step 3: Enjoy!
Now, start using your brand-new bathroom sink and admire your hard work.
Tip!
Now that you know how to install a bathroom sink, conquer these other areas of your bathroom:
How to Unclog a Bathroom Sink
How to Find & Install the Right Towel Bar Height for Your Bathroom
How to Install Tile: Laying Tiles on the Floor & Wall
How to Install a Medicine Cabinet
Frequently Asked Questions
What tools are needed to install a bathroom sink?
You'll need a bucket, adjustable wrench, pliers, utility knife, chisel, power drill, hacksaw or pipe cutter, pipe thread sealant or plumber’s tape, plumber’s putty, and a friend to help lift the sink.
How do I ensure my new sink fits properly?
Use the existing plumbing if possible, and measure the width, length, and depth of your new sink to match or adjust your vanity countertop's cutout.
When is professional help recommended during sink installation?
Hire a professional if moving the sink to a new location or if resizing the countertop cutout for a different sink size.
