How to Clean a Keurig
Learn how to clean your Keurig in five easy steps.
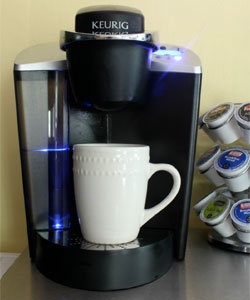
Photo: Stephanie Marchetti
Coffee machines are one of the few small kitchen appliances that are used on a daily basis, so they are bound to need a good scrubbing every now and again. Cleaning out your Keurig is surprisingly easy, and you only need one cleaner: white vinegar. It is non-toxic, eco-friendly, inexpensive, and the vinegar smell dissipates once it dries.
A Keurig disassembles into several smaller pieces, making cleaning a breeze.
What You'll Need:
- Distilled white vinegar
- Paper towels
- Rag
- Cotton swabs (optional)
Step 1
First, clean the funnel system that brings the water from the reservoir up through to the coffee pod. Start by pouring a mug full of vinegar into the empty tank, and then place the mug on the drip tray and brew a large cup. This will heat the machine and allow the vinegar to do all the work. Afterward, discard the vinegar and brew two to three cups of plain water to remove any remaining odor or residue.
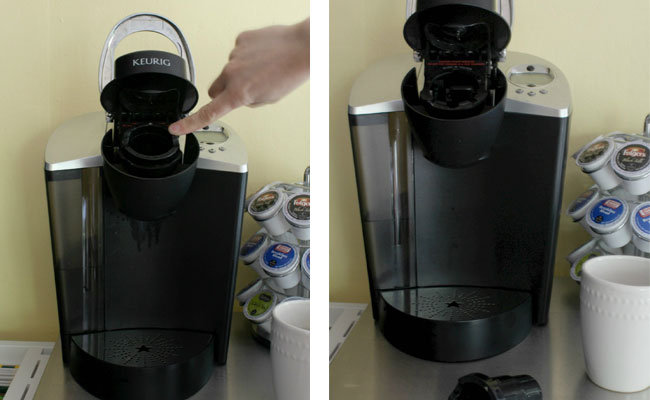
Photo: Stephanie Marchetti
Step 2
After you've turned off the Keurig, clean the area where the pod sits. The K-cup holder pops out if you push it up from the bottom. Rinse it in the sink to get rid of old grinds that can get stuck, wipe it down with a paper towel dampened with vinegar, then rinse with water again.
Tip!
Avoid using cleaners containing harsh chemicals on the water reservoir, K-cup holder, and funnel. Even after a good rinse, these chemicals can contaminate future brews.
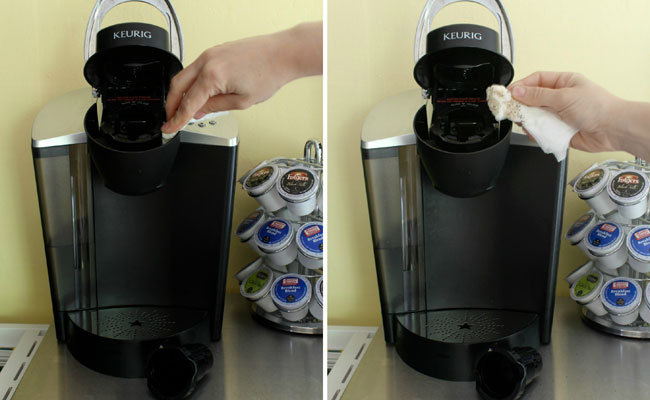
Photo: Stephanie Marchetti
Step 3
Before you put the K-cup holder back into your Keurig, clean the rest of the pod insert section of the machine with a rolled up paper towel or cotton swab dipped in hot water. Go over this spot a few times; you will be surprised at how dirty this gets! Watch out for the small needles that are used to puncture the K-cup when brewing. Now replace the K-cup holder. Find the little white arrow at the top center of the K-cup holder; this allows you to line it in the right spot. Leave the K-cup pod open to finish air drying.
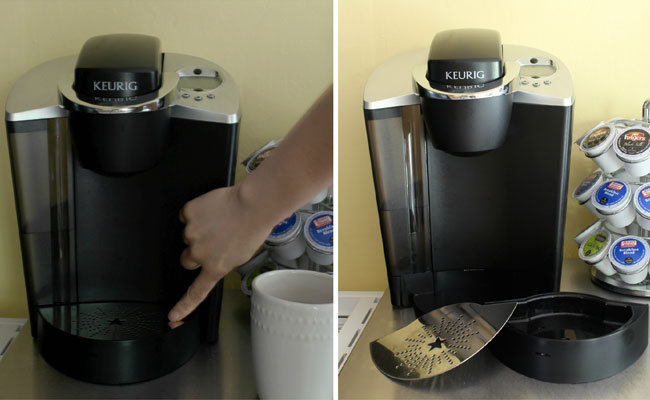
Photo: Stephanie Marchetti
Step 4
Pull out the bottom tray that the mug sits on. Most models will separate into two pieces: the black plastic drip tray and the metal grate. Rinse and wipe these down thoroughly to remove coffee stains and debris that has collected. If you have heavy staining or odors, soak these items in a sink full of hot water and vinegar solution for a while and then rinse with warm water. Air dry or towel dry these pieces thoroughly before putting the Keurig back together.
Tip!
For a deep clean, put the removable pieces of your Keurig (the drip tray and metal grate) into the dishwasher with a mild detergent and run on a regular cycle.
Step 5
Finally, wipe down the outside, which can get dusty over time. Dilute vinegar with water and wipe down the exterior. Diluted vinegar will leave a streak free shine, just like a chemical cleaner.
Congrats! Your Keurig is sparkly clean. To keep your machine clean and your coffee tasting fresh, put a reminder in your calendar to clean your Keurig every few weeks.
While you are on an all-natural kitchen cleaning kick:
- Put a bowl of white vinegar in your microwave for a few minutes on high, then wipe away any grease that has caked on the walls or plate with a paper towel or soft cloth.
- Clear out your sink drain with some baking soda and vinegar (full instructions are here).
- Get water stains off your glass stovetop. Sprinkle baking soda on the glass surface, then place a towel soaked in a vinegar and warm water solution on top of the baking soda for 15 to 20 minutes, finally wipe it all away for a grease free shine!
