Make Your Own Wedding Banner
Craft the perfect saying in 15 minutes (or less!) with this super easy DIY.
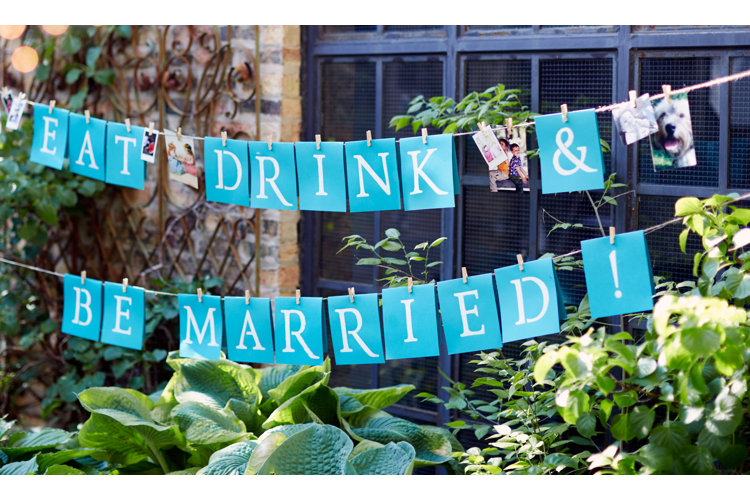
Even if you've never tried your hand at DIYing, don't be intimated—a banner is one of the fastest and most approachable projects out there. This playful piece of wedding-day decor is surprisingly hard to mess up and can easily be spun in infinite ways when armed with the basic framework ... which is exactly what we're giving you here! Now go on and get crafty.
Materials
Every banner is made up of four parts—flags, lettering, string, and a way to connect it all together—and you can get creative (or stay simple) with any of them.
Flag Options
- Table tents (what we used)
- Note cards (we love the A2 size)
- White card stock (perfect for expert DIYers, as you can cut and color any which way)
- Blank burlap banners (readily available at all craft stores)
- Gift tags (cute for smaller spots, like a card table or bar)
Lettering Options
- Stencil (make your own with your wedding font by printing and cutting out large letters)
- Freehand (fit for those with great handwriting)
- Craft paint and paintbrush (what we used)
- Paint pen, Sharpie, or chalk marker (great for white or metallics)
String Options
- Natural twine (with or without metallics woven in)
- Baker's twine (white string woven with any color you can dream of)
- Paper or burlap rope (what we used)
Connection Options
- Clothespins (what we used! available in mini and medium sizes)
- Washi tape (endless colors and patterns)
- Hole punch (if you want to weave your string through)
- Double-sided tape or glue (to create a flap for a seamless finish)
Steps
1. Choose Your Saying
Before doing anything (yes, even shopping), decide on what you want your banner to say—that way, you'll know the amount of materials you need.
Whether you want a classic phrase, like Mr & Mrs/Mr & Mr or Just Married, or something a bit more playful, like our Eat Drink & Be Married banner, mind your punctuation. To DIY like a pro, drop the periods from any place they'd be hiding, use an ampersand (not a plus sign), and tack on an exclamation point to the end if you go with a phrase.
2. Shop
Now that you know what you want to say, figure out how you want to say it! And give yourself room to make mistakes: Always buy extra flags in case a letter goes awry, and get more string than you imagine you'll need. If you plan to use clothespins or washi tape, double up on those as well to remove any possible day-of stress.
3. Letter
If you're making your own stencil, type out all the letters you'll need to spell out your saying, removing duplicates, and make them a giant size font (we're talking 200+). Print and cut out each letter, using scissors or an X-Acto knife, then trace on your flag or use as a stencil.
Paint or write each letter onto the flags, laying down newspaper or the like to protect your tabletop. Set them aside to dry for at least two hours before packing away.
4. Assemble
If you want to thread string though your banners rather than use clothespins or washi tape, create the flaps (or punch the holes) in advance. After the letters have completely dried, fold the top of each flag over and glue or tape it down. If using table tents, simply glue or tape the bottom together. String all your flags on and set aside for the big day.
For all other banners, you only need to assemble day-of. Collect all the materials together in one place, so nothing gets left behind. Once you're on site, measure out the length of string first, cut, and secure. Then add on flags, giving each a slight tug to make sure it's secure if the wind blows.
And if DIYing still isn't for you ...
