How to Use a Plunger
Goodbye, clogged drains.
If you're a homeowner or renter, it's likely that you've encountered a clogged drain at some point. Whether it's a toilet, sink, or bathtub, clogs can be frustrating and inconvenient. However, one tool that can often help alleviate the problem is a plunger. In this article, we'll discuss how to use a plunger effectively to unclog a drain.
Step 1: Choose the Right Plunger
There are two types of plungers commonly used for unclogging drains: the cup plunger and the flange plunger. The cup plunger is the most common type and is typically used for unclogging sinks and bathtub drains. The flange plunger, on the other hand, has a soft rubber flap that extends from the bottom of the cup and is used primarily for unclogging toilets.
When selecting a plunger, make sure to choose one that fits the drain you'll be unclogging. The cup plunger should be small enough to fit snugly over the drain and create a seal. The flange plunger should also fit snugly over the toilet drain.
Step 2: Prepare the Area
Before using the plunger, it's important to prepare the area to prevent water from splashing everywhere. For sinks and bathtub drains, remove any standing water with a bucket or a cup. For toilets, turn off the water supply to the toilet and flush it once to remove as much water as possible. You may also want to lay down towels or newspapers around the base of the toilet to catch any spills.
Step 3: Create a Seal
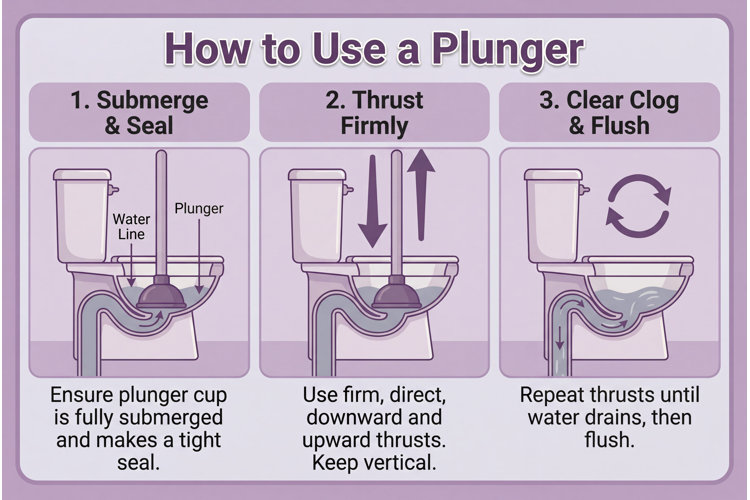
To create a seal with the plunger, place the cup or flange over the drain and press down firmly. Make sure the plunger is centered over the drain to create an airtight seal. If you're using a cup plunger, you can wet the rim of the cup with a small amount of water to help create a better seal.
Step 4: Use the Plunger
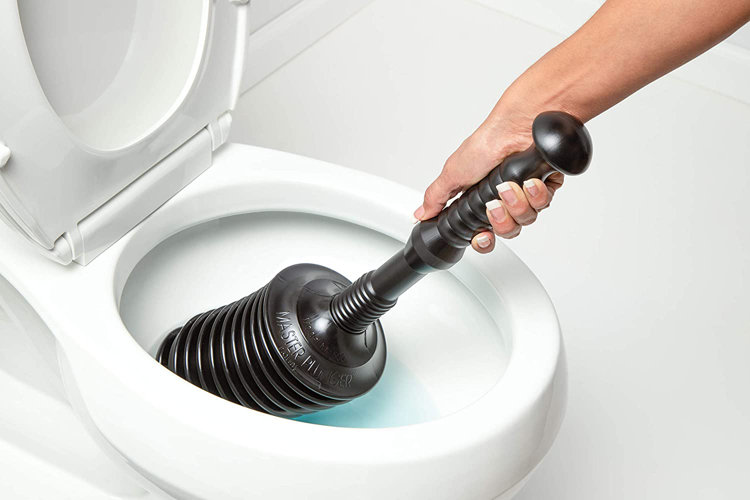
Once you've created a seal, you're ready to start plunging. Push down on the plunger with firm, even pressure, then pull up quickly. The goal is to create suction that will dislodge the clog. Continue plunging in this manner, making sure to maintain a tight seal between the plunger and the drain. If you're using a flange plunger, make sure the rubber flap is fully extended and covers the entire toilet bowl opening.
Step 5: Check for Success
After several plunges, remove the plunger and check to see if the water is draining properly. If it's not, repeat the plunging process several more times. If the clog is particularly stubborn, you may need to try a different approach or seek the assistance of a professional plumber.
Step 6: Clean Up
Once the drain is clear, clean up any remaining debris or standing water. For sinks and bathtubs, run hot water down the drain for a few minutes to flush out any remaining debris. For toilets, turn the water supply back on and flush several times to ensure the clog is completely cleared.
Some additional tips to keep in mind:
- Don't use chemical drain cleaners before or after plunging, as they can be harmful and can cause damage to your plumbing.
- Be patient and persistent. Sometimes, it may take several attempts to fully clear a clog.
- If you're using a cup plunger, make sure to use one with a flange on the bottom to create a better seal.
- Consider investing in a plunger with a longer handle to make the process easier and more comfortable.
- Always make sure the plunger is clean and free of debris before use.
In conclusion, knowing how to use a plunger is an important skill for any homeowner or renter. By following the steps outlined above, you can effectively and safely use a plunger to unclog a drain. However, it's important to remember that plunging may not always be successful in clearing a clog, and in some cases, a more advanced technique or professional plumbing services may be necessary.
