How to Install a Smoke Detector
Install your smoke detector quickly and easily.
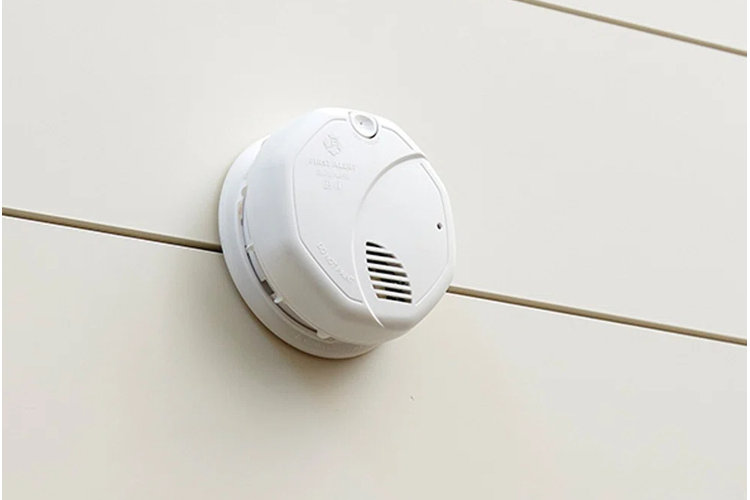
The safety of your family and your home should always be a priority. Installing a smoke detector is an important step in ensuring that your home remains safe from the risks of fire. Not only does it provide peace of mind, but it also follows legal requirements, can reduce insurance premiums, and may even save lives. In this article, you'll learn the benefits of installing a smoke detector, legal requirements for its installation, how to choose the right one for your home, and how to install a smoke detector. So if you’re ready to act and make sure your home is as safe as possible, read on!
Benefits of Installing a Smoke Detector
Having a smoke detector in your home is just as important as having a fire extinguisher and can be the difference between life and death. By raising the alarm for a potential fire in its early stages, it gives you and your family enough time to find safety, reducing injuries and property damage.
Smoke detectors are affordable and easy to install, making them an attractive option for any homeowner looking for peace of mind. Furthermore, they should be tested monthly to make sure that they’re working correctly and that all batteries are replaced when needed. It is also necessary to install them in every sleeping area as well as outside each one – this will ensure that everyone in your home receives the warning should there ever be any danger.

Installing a smoke detector is an important safety measure for your home and must be done according to local fire codes. Depending on the area you live in, there may be specific requirements regarding location, type of smoke detector, and installation methods. It is essential to be aware of these regulations before installing a smoke detector in your home.
In many areas, the law requires that smoke detectors be installed in each sleeping area and outside each bedroom. They should also be placed on every level of the house, including basements and attics. If you have multi-family dwellings, such as apartments or condos, additional detectors may need to be installed near common areas or shared hallways. You should contact your local fire department or county government office for specifics about what type of detectors are required for larger buildings.
Choosing the Right Smoke Detector to Install
There are several factors to consider when selecting a smoke detector, including power source, battery life, type of alarm, warranty information, and local fire safety regulations.
The power source for the detector is an important consideration, as some are powered by batteries and others are hardwired into the home’s electrical system. Battery operated detectors will require regular maintenance such as replacing batteries every six months or annually while hardwired detectors will require installation by a professional electrician for them to work correctly.
Finally, you must also be aware of local fire safety regulations when choosing a smoke detector so that you can follow them accordingly. Some jurisdictions may require specific types of detectors or additional features such as carbon monoxide monitors or interconnectivity between multiple detectors for them to meet regulatory requirements. Make sure to check with your local municipality before making any purchase decisions to guarantee compliance with all applicable laws and regulations.
Installing a smoke detector is an essential step in protecting your home and family from potential fire danger. Proper installation of the device is key to ensuring it is working correctly and providing the best protection possible. To guarantee proper installation, follow these step-by-step instructions:
1. Choose the location.
Smoke detectors should be installed on every level of your home, including the basement, and outside of sleeping areas. Choose a location that is at least 10 feet away from cooking appliances to avoid false alarms. Avoid installing in areas with high humidity or where steam may be present, such as bathrooms or kitchens.
2. Gather necessary tools.
You will need a drill, screws, and a screwdriver to install the smoke detector. You may also need a ladder if the installation location is high up.
3. Turn off power.
If you are replacing an existing hard-wired smoke detector, turn off the power to the circuit at the breaker box.
4. Remove the mounting plate.
For a new installation, use the mounting plate provided with the smoke detector. For a replacement, remove the old mounting plate and disconnect the wires.
5. Attach the new mounting plate.
Use the screws provided to attach the new mounting plate to the ceiling or wall. Use a level to ensure that the mounting plate is straight.
6. Connect the wires.
Connect the wires on the mounting plate to the wires on the smoke detector. The colors of the wires should match (black to black, white to white, and red to red).
7. Attach the smoke detector.
Align the smoke detector with the mounting plate and twist it into place. If your smoke detector has a battery backup, insert the battery.
8. Test the smoke detector.
Turn the power back on at the breaker box and press the test button on the smoke detector to ensure it is working properly.
9. Mount the cover.
Attach the cover to the smoke detector, either by snapping it into place or securing it with screws.
Congratulations! You have successfully installed a smoke detector. Remember to test it regularly and replace the batteries every 6 months.
Tip!
Make sure to follow any manufacturer's instructions that come with your smoke detector.
