How to Install a Bidet
You deserve a little luxury.
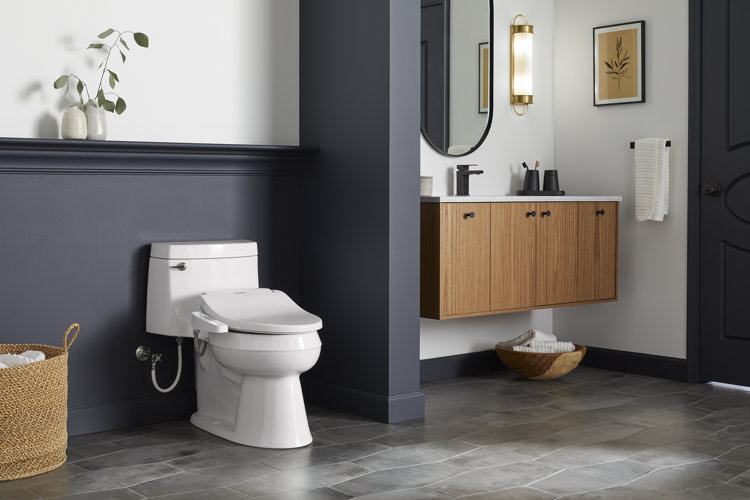
Originally invented in France in the 1600s, bidets have been commonplace in bathrooms throughout Europe for years. Because of their environmental friendliness (no toilet paper required!), bidets are actually mandatory in some European countries. They are becoming increasingly popular in the US and are even considered a premium feature in a well-appointed bathroom.
There are several different kinds of bidets: floor-mounted bidets, wall-mounted bidets, handheld bidet sprayers, bidet toilet seats, and bidet attachments. To learn more about these different types, read our guide Types of Bidets: Find the Best Bidet for You.
After you've chosen which type of bidet will work best for you, keep reading below to find out how to install a bidet in your bathroom.
In this guide:
How to Install a Floor-Mounted Bidet
How to Install a Wall-Mounted Bidet
How to Install a Bidet Sprayer
How to Install a Bidet Toilet Seat
How to Install a Bidet Attachment
Frequently Asked Questions
How to Install a Bidet
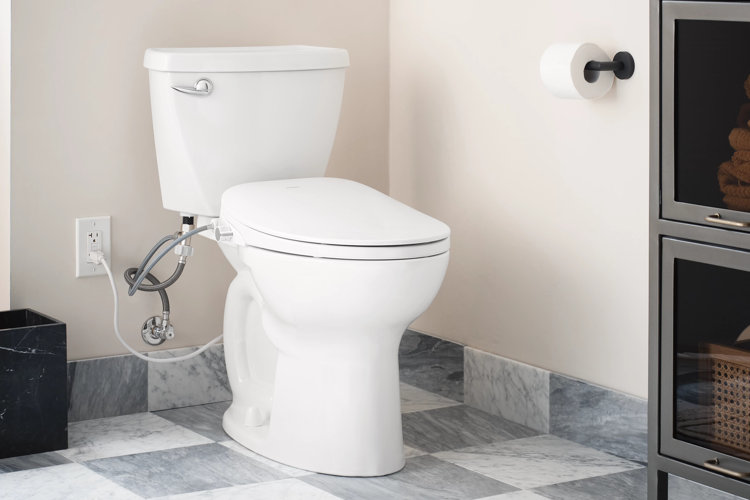
The installation process for the different kinds of bidets varies widely. For example, the freestanding unit requires more significant plumbing work prior to installation, while a bidet toilet seat can be installed in less than an hour. Because bidets need a water supply, all types of bidets require some plumbing work during installation.
For Freestanding Bidets: Floor- or Wall-Mounted
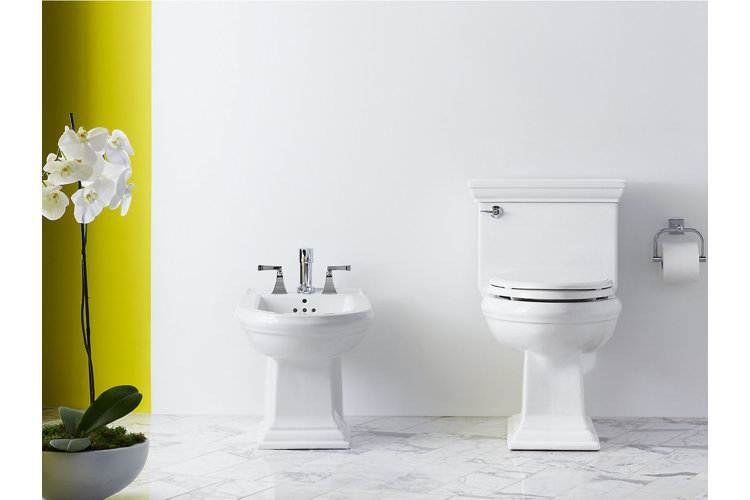
Whether mounted on the floor or wall, freestanding bidets require dedicated plumbing, as most need both hot and cold water supplies. In addition to dual water supply lines, they also require a vacuum breaker, a floor trap, and a smaller-sized drain than a toilet — a 1.5" drain instead of a 3" drain. Many bidets have internal vacuum breakers, but you'll need to check your specific unit. If yours doesn't have an internal vacuum breaker, one will need to be installed, along with dedicated plumbing. Note: Unless you are a skilled DIY plumber, it's probably wise to hire a professional to install the dedicated plumbing to your bidet.
Both wall- and floor-mounted bidets require approximately the same space as a toilet — about 30" wide and 4" deep. In most cases, the bidet is located next to the toilet. Obviously, the space required will vary based on the exact size of the unit you choose, but allotting the same space you would for a toilet is a good starting point.
Installing a Floor-Mounted Bidet
Materials:
- Your floor-mounted bidet
- Bidet faucet, typically sold separately
- Bidet-mounting kit, typically sold separately
- Marker or pencil
- Adjustable wrench
- Drill with drill bits
- Level
- Silicon sealant
The drain for a floor-mounted bidet is located in the floor, however, the water supply lines can be either in the wall or the floor. You'll need to study your specific plumbing configuration to know which you have prior to installing your bidet. As with any installation, you'll need to carefully read the instructions and owner's manual before you begin.
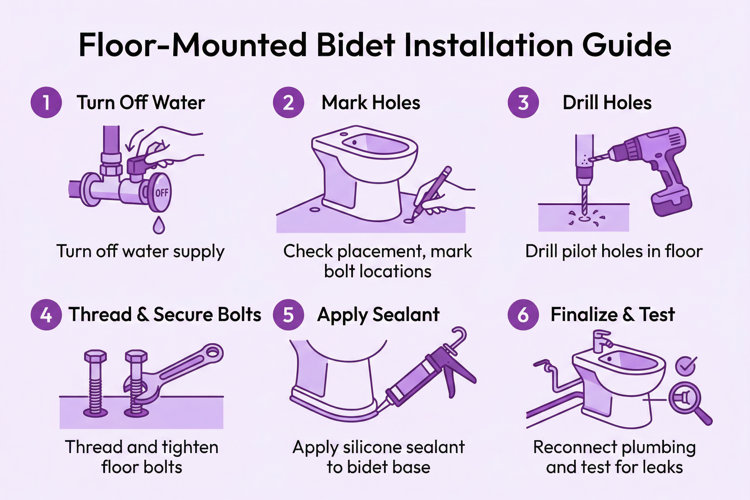
Step 1: Turn Off the Water Supply
As the first step, you'll need to shut off the water supply.
Step 2: Assemble the Bidet
Assemble your bidet and faucet according to the manufacturer's instructions. Temporarily place the bidet over the drain and check to make sure the flexible water supplies line up properly.
Step 3: Check the Placement
Using a marker or pencil, mark the placement of the bidet and the bolt-holes on the floor. In some cases, the bidet might come with a template you can use to determine bolt placement.
Step 4: Drill the Pilot Holes
Remove the bidet and drill pilot holes using the bolt-holes placement marks you made, or using the provided template.
Step 5: Thread the Bolts
Thread the bolts through the holes and replace the bidet over the bolts to make sure everything lines up. Also, use the level to make sure the bidet is straight.
Step 6: Add the Sealant
Remove the bidet and put silicone sealant on the floor around the base of the bidet.
Step 7: Secure the Bidet
Replace the bidet and secure it to the floor using the washer and nuts included in your mounting kit. Tighten with a wrench if needed. Wipe away any excess sealant.
Step 8: Reconnect the Plumbing
Connect the drain, shut-off valve, and water supplies through the back of the bidet.
Step 9: Turn the Water Supply On
Turn the water back on, check for leaks, and make sure the bidet is working properly.
As mentioned previously, a wall-mounted bidet requires dedicated plumbing. If you have DIY plumbing experience, you could install the required plumbing yourself. If not, you'll likely need the help of a professional.
The plumbing connections and drain for a wall-mounted bidet will be in the wall. Your wall-mounted bidet will come with a special mounting frame and hardware that will need to be installed before drywall or tile. Follow the instructions provided by the bidet manufacturer when installing the mounting frame. Once installed, the attachment bolts will stick out of the wall.
Because the bidet attaches to the wall, it will need to be aligned with the plumbing and held tightly against the wall while being secured. So you'll likely need someone to help you during that part of this bidet's installation.
Materials:
- Your wall-mounted bidet
- Installed mounting frame and provided hardware
- Bidet faucet, typically sold separately
- Adjustable wrench
- Level
- Silicon sealant
Step 1: Turn Off the Water Supply
As the first step, it's important to turn off the water supply.
Step 2: Assemble the Bidet
Assemble your bidet according to the manufacturer's instructions included with your unit. Temporarily place the bidet on the mounting hardware on the wall, making sure the drain and bolts (or whatever hardware your unit includes) line up properly. Use the level to make sure the unit is straight.
Step 3: Add the Sealant
Remove the bidet and put silicone sealant where the bidet will be flush against the wall.
Step 4: Attach the Bidet
Replace the bidet, connect the flexible water supplies, line up the drain, and place the bidet on the mounting hardware. Hold it against the wall as you tighten the washers and nuts over the bolts (or whatever hardware came with your unit). Wipe away any excess sealant. Place the bolt caps over the bolts.
Step 5: Turn the Water Supply On
Turn the water back on, check for leaks, and make sure the bidet is working properly.
Handheld bidet sprayers are attached to your existing toilet and only require very simple plumbing work to install – this one is the easier to DIY! As always, make sure you read the owner's manual and manufacturer's installation instructions provided with your bidet sprayer.
Materials:
- Handheld bidet sprayer – most units come with all the parts and hardware you need for installation.
- Wrench, if needed. In most cases, you can hand-tighten the connections.
Step 1: Turn the Water Supply Off
Start by turning off the water supply to your toilet and flushing the toilet so the tank is empty.
Step 2: Determine the Right Placement
Determine the best location for your sprayer and hanger. This is where it is most convenient for you to reach, hold, and use it. The length of the hose provided and the location of your water line will also play a role in which side of your toilet tank you will place the unit. If you have a shorter hose, you'll likely need to hang the unit on the same side as the water line.
Step 3: Assemble the Sprayer
Screw the sprayer onto one end of the flexible hose provided with your kit.
Step 4: Unscrew the Water Supply Hose
Go to the underside of your toilet tank, where the flexible water supply hose is connected, and unscrew the hose from the tank.
Step 5: Attach the T-Valve
Take the T-valve included in your kit (this is a small plumbing part shaped like a T with three openings to connect hoses and a flow control lever), place a washer in the top opening, and screw the T-value onto the connection on the underside of your tank where you just unscrewed the flexible water supply hose. Tighten the connection using a wrench, if needed.
Step 6: Connect the Flexible Water Supply Hose to the T-Valve
Attach the flexible water supply hose that was previously attached to your tank to the bottom connection of the T-valve and tighten.
Step 6: Attach the Sprayer Hose
Insert a washer into the connection at the other end of the sprayer hose, attach the hose to the front opening of the T-valve, and tighten. Place the sprayer holder either on the side of the tank or attach it to the wall (wherever you previously decided to locate it).
Step 7: Turn the Water Supply On
Turn the water to your toilet back on, check for leaks, and make sure your bidet sprayer is operating properly.
Bidet toilet seats replace your existing toilet seat but, unlike regular toilet seats, they require a water supply line. This requires some very simple plumbing work. Before you get started, make sure you read the owner's manual and manufacturer's installation instructions. There are two kinds: electric and non-electric.
While they vary by model, electric bidet toilet seats offer a host of features not offered by non-electric models. These include warm water, heated seats, bowl lighting, remote controls, and more. To use an electric model, you will need an electrical outlet near the toilet. All electrical outlets in bathrooms are required to be protected by a ground fault circuit interrupter (GFCI). If you are experienced with home improvements, installing the correct kind of outlet could be a DIY task. However, if you're uncomfortable with electrical work, hiring a professional electrician for the job is probably a good idea.
Installation instructions for both electric and non-electric bidet toilet seats are essentially the same. With an electric version, you would simply plug your seat in after it is installed.
Materials:
- Bidet toilet seat
- A bidet toilet seat mounting kit, in most cases, sold separately
- Flat-head screwdriver
- Wrench
Step 1: Turn Off the Water Supply
Start by turning off the water supply to your toilet and flushing the toilet so the tank is empty.
Step 2: Remove the Existing Toilet Seat
Remove your existing toilet seat, including all nuts and bolts.
Step 3: Attach the Mounting Plate
Attach the mounting plate, align it with the existing toilet holes, and screw it in place using provided bolts and screws. You can hand-tighten the bolts, but you can also use a wrench if needed.
Step 4: Attach the Bidet Toilet Seat
Slide the bidet toilet seat onto the mounting plate until it clicks into place.
Step 5: Disconnect the Flexible Water Supply Hose
Go to the underside of your toilet tank where the flexible water supply hose is connected and unscrew the hose from the tank.
Step 6: Attach the T-Valve
Take the t-valve included in your kit (this is a small plumbing part shaped like a T with three openings to connect hoses), place a washer in the top opening, and screw the t-value onto the connection on the underside of your tank where you just unscrewed the flexible water supply hose. Tighten the connection using a wrench, if needed.
Step 7: Reconnect the Flexible Water Supply Hose
Attach the flexible water supply hose that was previously attached to your tank to the bottom connection of the t-valve and tighten.
Step 8: Attach the Sprayer Hose
Insert a washer into the connection at the other end of the sprayer hose, attach the hose to the front opening of the t-valve, and tighten.
Step 9: Plug the Toilet Seat In
If you have an electric bidet toilet seat, plug the electric cord into the electrical outlet.
Step 10: Turn the Water Supply On
Turn the water to your toilet back on, check for leaks, and make sure your bidet toilet seat is operating properly.
Bidet attachments are installed under your existing toilet seat. All the parts you need should be included with the unit.
Materials:
- Bidet attachment
- Flat-head screwdriver
- Wrench
Step 1: Turn the Water Supply Off
Start by turning off the water supply to your toilet and flushing the toilet so the tank is empty.
Step 2: Remove the Existing Toilet Seat
Remove your existing toilet seat. Place the bidet attachment on your toilet and line up the unit with the holes on your toilet.
Step 3: Add the Existing Toilet Seat
Place your existing toilet seat over the bidet unit and line it up with the holes and the bidet attachment.
Step 4: Reattach the Toilet Seat Bolts
Replace and tighten the toilet seat bolts.
Step 5: Disconnect the Flexible Water Supply Hose
Go to the underside of your toilet tank where the flexible water supply hose is connected and unscrew the hose from the tank.
Step 6: Attach the T-Valve
Take the T-valve included in your bidet attachment (this is a small plumbing part shaped like a T with three openings to connect hoses), place a washer in the top opening, and screw the T-value onto the connection on the underside of your tank where you just unscrewed the flexible water supply hose. Tighten the connection using a wrench, if needed.
Step 7: Reconnect the Flexible Water Supply Hose
Attach the flexible water supply hose that was previously attached to your tank to the bottom connection of the T-valve and tighten.
Step 8: Attach the Sprayer Hose
Insert a washer into the connection at the other end of the sprayer hose, attach the hose to the front opening of the T-valve, and tighten.
Step 9: Turn the Water Supply On
Turn the water to your toilet back on, check for leaks, and make sure your bidet attachment is operating properly.
Frequently Asked Questions
What types of bidets can be installed?
You can install floor-mounted, wall-mounted bidets, handheld sprayers, bidet toilet seats, and bidet attachments.
How much space does a floor-mounted bidet require?
A floor-mounted bidet requires approximately the same space as a toilet, about 30" wide and 4" deep.
Do wall-mounted bidets need special plumbing?
Yes, wall-mounted bidets require dedicated plumbing, typically installed with professional assistance.
Article by Amy Wright.
