How to Change a Thermostat (Install & Replace Guide)
Learn how to change a thermostat.
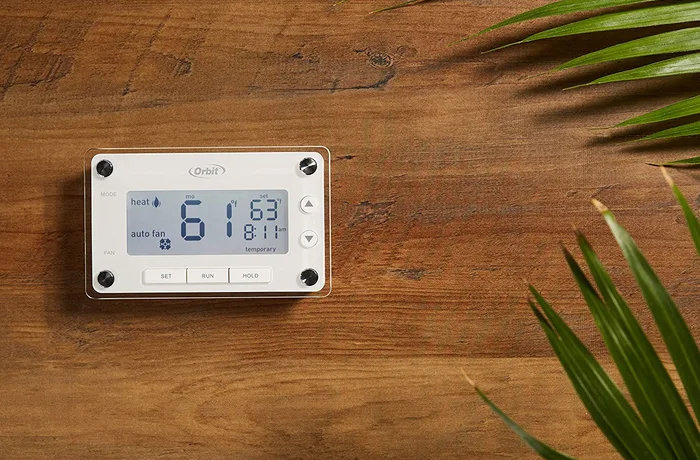
The thermostat is a small home fixture that plays a big role in daily comfort – and your monthly energy bills. If your home feels warmer or cooler than the dial reads, or if your current setup lacks energy-efficient programming, it might be time for an upgrade. Learning how to install a thermostat (or swap out an old model) is an approachable DIY project that can give you better control over your home's temperature and energy use. Read on for a clear, step-by-step guide to installing a replacement thermostat safely and correctly.
Before You Start: Compatibility, C-Wire & Safety
Before you get started, confirm your HVAC system type and ensure your replacement thermostat is fully compatible. Most residential homes use low-voltage systems (typically 24V), which are compatible with standard manual, programmable, or smart thermostats. However, if your existing unit is connected to thick wires with wire nuts or marked 120V/240V, you have a line-voltage system – often used for electric baseboard heaters – which requires a specialized line-voltage replacement. Always shut off power at the main breaker box and test the wires to ensure no electricity is flowing before you begin.
Neighborly Tip!
If you find your thermostat is connected to a 120/240v line-voltage system, we recommend hiring a licensed electrician to help you.
Tools & Materials You Need
Here are the essential tools you’ll need to swap out a thermostat:
- Voltage tester: To confirm the power is safely disconnected.
- Screwdrivers: Both flathead and Phillips-head for removing plates and securing wire terminals.
- Painter's tape and pencil: For labeling individual wires during disconnect.
- Mini spirit level: To ensure your new wall plate is mounted straight.
- Drill and drill bits: For installing new wall anchors if screw hole locations differ.
- Smartphone or camera: To take a quick reference photo of your existing wiring setup.
- Your new thermostat: Have your thermostat ready and be sure to read all manufacturer instructions before installing.
Check for a C-Wire
A C-wire (or common wire) supplies 24V power to your thermostat, which is essential for Wi-Fi connections, backlit color screens, and smart features. While traditional manual or basic programmable models run on batteries, most smart thermostats require a C-wire to function reliably.
To check for a C-wire, pop off your current thermostat's faceplate and inspect the terminal labels. If you see a wire connected to the terminal labeled "C," your system is smart-thermostat ready. If there isn't a C-wire present, you can look for an unused wire tucked inside the wall cavity, install a C-wire adapter kit, or select a smart thermostat model designed to work without one.
When to Call an HVAC Pro
Replacing a like-for-like low-voltage thermostat is a manageable DIY task. However, certain setups require expert assistance. You should call a licensed electrician if:
- You have a high-voltage line-voltage system (120V or 240V).
- Your home uses complex multi-stage heating/cooling, heat pumps with emergency heat, or zoned HVAC systems.
- You lack a C-wire and are uncomfortable installing a power adapter at the furnace control board.
- You test the wiring and find live voltage remaining after switching off the breaker.
Neighborly Tip!
If you’re not sure about something when working with your home’s electrical system, don’t risk it – call a professional for help.
Thermostat types for a DIY replacement
| Type | Best for | Wiring needs | DIY difficulty |
|---|---|---|---|
| Manual / non-programmable | Simple heat/cool control | Basic R/W/Y/G | Easiest |
| Programmable | Set schedules, save energy | Same + optional C | Easy |
| Smart / Wi-Fi | App control & learning | Often needs C-wire | Moderate |
| Line-voltage | Baseboard / high voltage | Specialized | Pro recommended |
Neighborly Tip!
Still have questions about types of thermostats? Check out our comprehensive guide on all the Types of Thermostats You Need to Know.
How to Change a Thermostat in 13 Steps
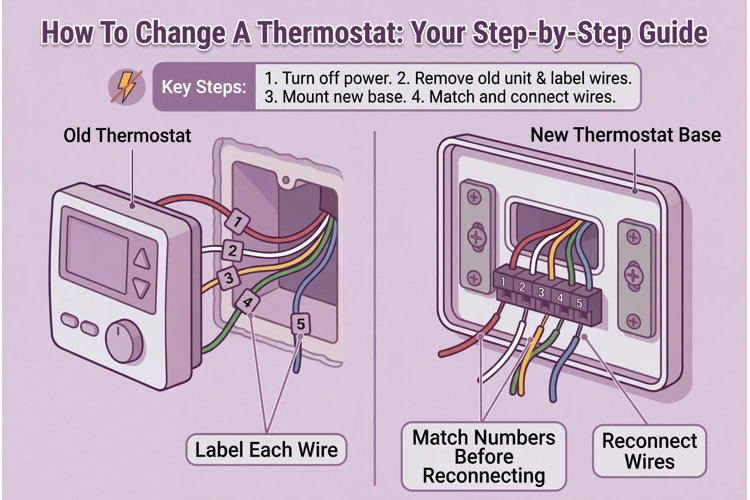
Replacing a home thermostat is a straightforward process when you take the proper safety precautions and label your wiring. Follow these 13 steps to remove your existing unit and safely install your replacement thermostat.
1. Disconnect Power at the Breaker
Safety first! Locate your home's main circuit breaker box and switch off the power to your thermostat, air conditioning unit, and furnace or heating system.
- If your system includes a boiler, switch off the nearby fused connection unit (FCU) or cut power to the main socket circuit.
- To test this, while the boiler is on, go to your fuse box and switch on the circuit breaker to cut the electricity supply to all sockets in your house.
- The boiler should now be off. Use the voltage tester to confirm the thermostat wiring has been isolated.
- If it is dead, you know it’s on the "sockets" circuit.
- For added safety, unplug the socket next to the boiler.
2. Check System Compatibility
Before unboxing your new thermostat, check your current wiring against your replacement thermostat’s system requirements. Confirm whether your setup is low-voltage (24V) or line-voltage (120V/240V) to avoid damaging your system.
3. Review Manufacturer Instructions
Read through the installation manual provided with your new thermostat. Review all wiring diagrams, terminal specifications, and mounting instructions before handling any wires.
4. Remove the Front Plate
Gently pull or slide the existing thermostat's faceplate upward and off the wall plate. This will expose the wiring terminal block and mounting screws. Do not touch any terminal screws or exposed copper until you verify power isolation.
5. Verify Power Is Off
Use a reliable voltage tester on the exposed wire terminals to confirm that no electrical current is running through the unit. Do not skip this step.
6. Label Wire Locations
Take a clear photo of the existing wire connections for reference. Next, use painter's tape and a pencil to label each individual wire with the terminal letter it is currently attached to. Do not rely on wire sleeve colors alone, as previous installers may not have followed standard color codes.
7. Disconnect the Wires
Carefully loosen the terminal screws or press the release tabs to free each wire. If the bare copper ends appear corroded, use wire strippers or a utility knife to expose clean, bright copper. Once the wires are free, remove the old backplate from the wall.
8. Secure the Wires
Prevent loose wires from slipping back into the wall cavity. Wrap painter's tape around the bundle and secure it to the wall surface, or gently tape the wires around a pencil to temporarily bridge the wall opening.
9. Mount the New Wall Plate
Thread the labeled wires through the center opening of your new wall plate. Hold the plate against the wall, line it up using a mini spirit level, and mark the screw holes with a pencil. Drill pilot holes, insert wall anchors if needed, and screw the wall plate securely into place.
10. Reconnect the Wires
Insert each labeled wire into its corresponding terminal on the new wall plate (referencing your photo and labels from Step 7). Tighten the terminal screws firmly so each connection is secure and cannot pull loose.
11. Attach the Front Plate
Gently push any excess wire length back into the wall cavity. Align the replacement faceplate over the mounted wall plate and press firmly until it snaps into place.
12. Restore Power
Return to your breaker box and switch the power back on for your HVAC system, thermostat, and heating unit.
13. Test System Operation
Set your new thermostat to heat or cool and confirm that your system responds promptly. If you installed a smart thermostat, complete the initial setup using the manufacturer's mobile app.
Thermostat Wiring Labels Cheat Sheet
| Terminal | Typical color | Function | Notes |
|---|---|---|---|
| R / Rh / Rc | Red | 24V power | Rh heat / Rc cool |
| C | Blue / black | Common | Often needed for Wi-Fi |
| W / W1 | White | Heat | W2 = stage 2 heat |
| Y / Y1 | Yellow | Cooling / compressor | Y2 = stage 2 cool |
| G | Green | Fan | Indoor blower |
Frequently Asked Questions
What is the first step in changing a thermostat?
The first step is to disconnect the power to the thermostat at the breaker box.
Why should you not replace an old thermostat with a smart one yourself?
The voltage is not compatible and the process is complex and dangerous.
How can you ensure wires don't fall back into the wall?
Tape a pencil to the wires or tape them to the wall to secure them.
