DIY St. Patrick's Day Party
Create your own luck of the Irish with these 5 simple and family-friendly DIY ideas.
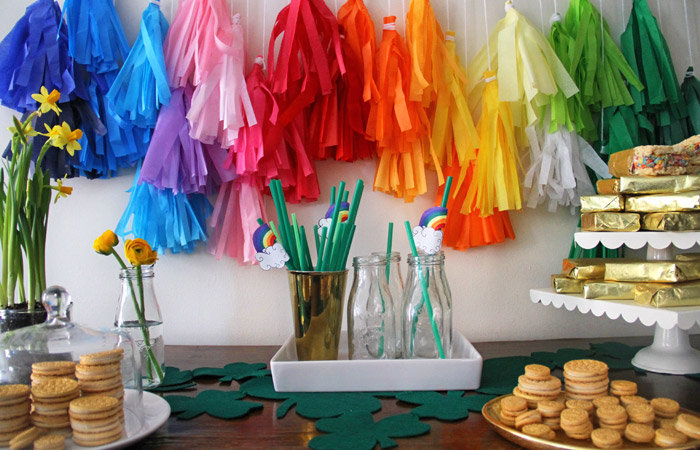
This St. Patrick's Day, you won't need a lucky charm to have a fun party! Make some of our cheery decorations and festive treats to add color, fun, and a little bit of gold to your home.
Rainbow Tassel Backdrop
Legend has it that you can find a pot of gold at the end of the rainbow, so setting up your party at the end of the rainbow is even better! Adding balloon clouds gives this decor DIY a sweet and whimsical look.
Supplies
24 sheets of tissue paper (variety of shades)
1 ball white yarn or string
12 white balloons
3 white hangers
3 nails
Scissors
Instructions

Step 1: In the microwave, melt the butter in a bowl, stopping and stirring every 30 seconds.
Step 2: Add marshmallows, and continue to melt and stir every 30 seconds.
Step 3: Stir cereal into mixture until well coated. Pour into a baking dish, then flatten with wax paper.
Step 4: Let cool, then cut into rectangles and wrap in gold aluminum foil.
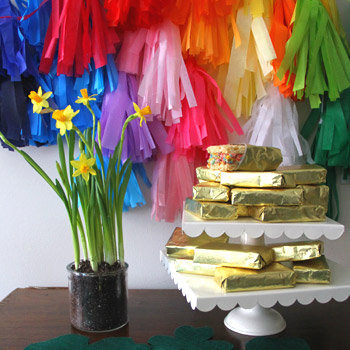
Tip! The daffodil, or narcissus, is a welcome symbol of spring. We replanted this one in a short vase as a reminder that spring is just around the corner.
Bricks of Gold Rainbow Treats
For these treats, we made two layers of regular marshmallow rice treats with one layer of rainbow treats in between (see image right), but you can mix together rice cereal and rainbow-colored cereal if you prefer. To make the layers, divide the butter and marshmallows in half and make one batch with 3 cups rice cereal and another with 3 cups of rainbow-colored cereal.
Supplies
1 bag (10 oz.) or 4 cups marshmallows
4 tbsp butter
6 cups rainbow colored cerealGold aluminum foil
Wax paper
Instructions
Step 1: In the microwave, melt the butter in a bowl, stopping and stirring every 30 seconds.
Step 2: Add marshmallows, and continue to melt and stir every 30 seconds.
Step 3: Stir cereal into mixture until well coated. Pour into a baking dish, then flatten with wax paper.
Step 4: Let cool, then cut into rectangles and wrap in gold aluminum foil.
Tip! The daffodil, or narcissus, is a welcome symbol of spring. We replanted this one in a short vase as a reminder that spring is just around the corner.
Gold Coin Cookies
Don't worry, there will be plenty of gold to go around! These gold leprechaun coin cookies will be a hit with adults and kids alike! We found edible gold spray paint in the baking aisle of the craft store, along with other cake decorating equipment.
Supplies
Vanilla sandwich cookies
Edible spray paint, gold
Instructions
Step 1: In a ventilated area, and over a covered work surface, spread cookies out. Make sure to leave a little space between each one.
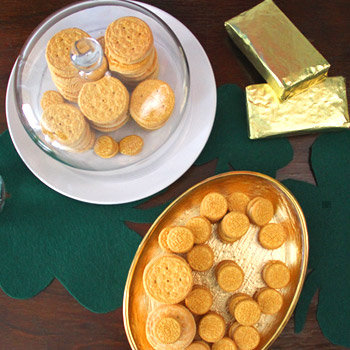
Step 2: Spray cookies with edible spray paint in back and forth motions.
Step 3: We recommend that you spray one coat, then let dry before spraying another coat.
Step 4: Let second coat dry, then flip cookies over and spray other side (optional).
Tip! Use a glass cake stand cover on a plate for an easy and stylish decorative touch.
Straw Embellishments
Make sure everyone knows which drink is theirs with these cute DIY straw labels. Make these with items that you already have around the house!
Supplies
Straws
Paper
Scissors
Markers
Tape
Instructions
Step 1: Draw a rainbow and cloud, color in with markers. Repeat this for the number of guests you expect.
Step 2: Write names on the clouds to label drinks.
Step 3: Cut out each cloud and rainbow set. Fold in half.
Step 4: Use tape to attach to straws. We used double-sided tape, but you can also roll up pieces of regular tape.
Shamrock Table Runner
This simple and inexpensive DIY is quick to make and requires the most basic sewing skills. You can make the runner free-flowing like we did, or more structured and linear.
Supplies
2 yards or 10 small sheets felt, greenEmbroidery floss, green
Needle
Scissors
Instructions
Step 1: Cut shamrock shapes out of felt. We cut two sizes: large and small. If you prefer, draw a shamrock shape onto the felt with chalk before cutting. We cut about eight large shamrocks and 20 small shamrocks.
Step 2: Lay the shamrocks out on the table or sideboard that you are using.
Step 3: Thread the needle with embroidery floss and sew the edges of the shamrocks that touch together with a simple cross stitch.
