Skip to Main Content
Sign In
Sign In

Best Pergolas With Reviews

Top-rated customer favorites with reviews

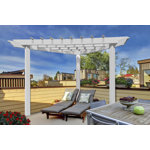
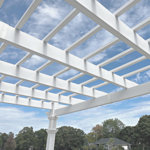
Alcove Corner Vinyl Pergola 96"L x 96"W x 94"H

Alcove Corner Vinyl Pergola 96"L x 96"W x 94"H

$899.18

Rated 5 out of 5 stars.

03/21/2021
We bought our first home two years ago and this year we decided to work on the yard. We wanted a small pergola in order to make a little square of dirt into something special. This was the only 3 post pergola I could find and it happened to match our fence perfectly. We are thrilled with the results and now have some new DIY skills we didn’t have before. It should be known that this pergola is, in a sense, a vinyl covering for a wooden pergola. It will not stand alone so if you are looking for a quick backyard shelter, I wouldn’t suggest this at all. You will need a saw, a drill, lumber, many levels, string, a tape measure, multiple people and potentially a post digger and concrete of you plan to secure it in dirt. Be prepared to spend more money. Also, read all of the instructions from the start. They are not great (for example, they say you might need a saw but you very much need a saw). I’m giving this review 5 stars because the end result is even better than what I imagined. The item came quickly, in four boxes without any damage. We also had a ton of wind right after installation and the thing stayed solid. That said, it took my husband and myself maybe 5-6 hours over the course of ten days to complete (plus 8 trips to the hardware store and we had to rent a pickup truck). Really a great option for a small space. If you aren’t a skilled DIYer then you’ll either need a professional or a lot of YouTube videos but we did it so I believe in you. Good luck!
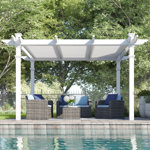
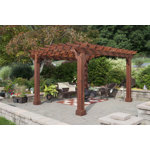
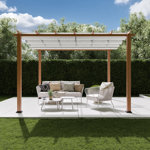
Corfu Vinyl Pergola

Corfu Vinyl Pergola

$1,729.99

Rated 4 out of 5 stars.

09/17/2019
Very nice good quality product. I was a little worried as I was assembling as I thought it seem not very strong and was afraid it would not stand up to wind. Once all assembled it is very sturdy and should last very long time. My patio is 11.6 x 14 so I had to shorten by 7" and did so in the middle section. This was very easy to do and everything fit perfect following the modification instructions. Item was shipped with steel post holders and base trim so I had to return the ones I ordered as description stated they were not included. The Screws used are a little weak and will strip of bend easily. Once I started using a dewalt screw holder then things went much better but still bent about 6 screws. Called NEA CS and they sent new screws right away. The new screws were higher gage and should be included to begin with so taking a star away for that. Instructions are simple to follow. Only part that was hard to tell what to do is setting the steel post holders as the distance is measured from flanges and not the post holder sides. I was very careful making sure the 4 posts were square and must of got it as everything fit into place perfectly. If you want a very nice pergola with adjustable slats then this is what you need. We got a quote to get something similar installed and cost was around $10,000. We are very happy with purchase and this pergola make the patio look bigger. We can not set out under pergola without the intense sun beating down on us.
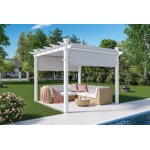
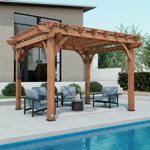
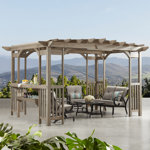
Backyard Discovery Beaumont 12' x 10' Cedar Wood Outdoor Patio Pergola Kit with Trellis Roof and PowerPort

Backyard Discovery Beaumont 12' x 10' Cedar Wood Outdoor Patio Pergola Kit with Trellis Roof and PowerPort

$1,199.00

Rated 5 out of 5 stars.

02/24/2017
Long write up but hopefully helpful
Don't usually do this but the directions are not great so thought this might help. Product came on a pallet in two boxes....all parts received and no damage noted. Two of the joists were warped but that can be corrected as indicated below. Most of this assembly can be done with one helper. Steps 1 + 2: Hold off on these until completing Steps 3 + 4. The angle braces get in the way when attaching the joists to the pergola posts. Wound up taking them off. Steps 3 + 4: This is where a third set of hands comes in handy. The 7 1/4 screws are barely long enough to get through the two joists and the post, hence the reason to remove the angle braces first (from Steps 1 + 2 above). Two of the joists have a series of holes in the top so make sure they are facing up and on the outside. Once you get the four posts attached to the joists (tough if you don't have that 3rd set of hands), you can easily install the 4 long and 4 short angle braces and secure them to the posts with the lag screws. Plumb everything square and lock it in at this point. Note: Our pergola is freestanding and over an above ground spa, so at this point, due to weight considerations, we moved it to its permanent location, completed Step 13, realigned, secured, and sent the 3rd set of hands (my wife) back into the house to avoid further conflict. Steps 5 through 8: Simple and straightforward...attaching the joist ends to the joists. One thing to note not in the instructions - four of the joist ends have holes in the top (D7s) so make sure to identify them. There are no markings on the parts. Step 9: Don't worry if any of the slotted joists are warped as you can correct that in Step 10. Just secure them as indicated. Step 10: Purlins have predrilled holes in them so just line up your first set and secure. Fit the long purlin angle end under the short purlin angle end to give a cleaner finish. Step 11 + 12: Final Steps on our install. Make sure to do a lot of measuring as not all the purlins are perfectly straight and you want the finished product to be. Additionally, this is where you are able to straighten any slotted joists that may have arrived warped by bending the joist straight (difficult) and securing in place to the purlin(s). Final notes: The hardware is not great but workable and extra is provided. You may find you need to widen some of the predrilled holes. Also had two holes predrilled on the wrong end of one of the angle braces but easily correctable. Finally, held off on water sealing due to overnight temperatures dropping below optimal, but will do so in the spring,. Bottom line...directions and hardware are the only drawbacks but neither insurmountable. Really sharp looking finished product and sets off the area we put it in nicely. Happy with the purchase. Good luck.
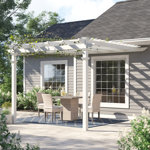
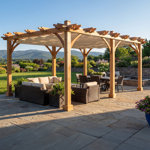
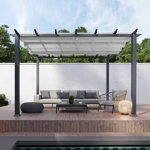
Florence  Aluminum Pergola in Gray Powder-Coated Finish with Adjustable Canopy

Florence Aluminum Pergola in Gray Powder-Coated Finish with Adjustable Canopy

$1,149.00

Rated 5 out of 5 stars.

07/16/2024
Fabulous product made with good materials. I got the 11 x 16 which I recommend over the 11 x 11 Can be installed by just yourself if clever, by securing one post then the crossbar, then another post secured, and join etc, and repeat. If not, you will need a second person and maybe a third. The ground spikes are very functional and can be pounded in between paver stones vs having to drill and use the concrete bolts. The shade fabric is a dense weave and very high quality, which was not apparent from the photos. The support person Tammi at Paragon is very helpful and fully knowledgeable. Might buy another. Tips 1. do each section one at a time and count out the indicated items and screws for that section only. When not screws are left then move onto next section. If not youll likely miss some bolts like I did. 2. careful not to install part 11 or 11a upside down like I did. 3. The angle support beam 29 or 30, can be tricky to get bolts into the bracket holes, what to do is tilt it at angle to catch the hole and tighten. Itll be jutting out but it straightens out when loaded, andor put washers underneath the bracket to give the beam more space to slide on but will still need to bolt in on an angle to catch the hole. If dont do it this way youll need to drill new holes and dont want to do that. 4. Leave bolts loose until end of section, especially the bolts at the top of the four posts because there is a bracket that will be accepting a cross member. Use a cordless drill with a hexAllen bit vs manually using the hex tool supplied, like I did, youll save an hour of time. 5. Use ladder five feet back from structure to hold the 18-19-18 long rod parallel while inserting the rods into the fabric and looping through the reels, and this way can even do it alone. 6. If you do use the concrete bolts, will need a 38 masonry drill bit. 7. Part 7A looks like 7 but someone at factory handwrote a A in faint red pen, so look closely.
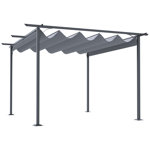
Sunjoy Mesquiter Outdoor Pergola 11 x 11 ft. Black Steel Pergolas with Retractable Tan Sun Shade Canopy for Patio, Backyard,

Sunjoy Mesquiter Outdoor Pergola 11 x 11 ft. Black Steel Pergolas with Retractable Tan Sun Shade Canopy for Patio, Backyard,

$996.45

Rated 5 out of 5 stars.

09/12/2021
This is really nice. It took my husband about 3 hours to build, mostly by himself. When he needed help attaching the larger assembled bits I helped. Initially we noticed there were too many holes as other reviewers have commented. Then the screw holes seemingly did not line up at first. In the instructions it shows the poles with circles on certain sides. For the screw holes at the top of the poles to align with the piece you want to screw into it, the poles have to be positioned as shown in the instructions for the screw holes to line up (there are circles shown on the poles in the diagram and that’s what has to be positioned correctly— sorry the photo is wrinkly but they got rained on a little). It’s hard to see because the screw holes look the same distance but they are NOT, and one set is actually narrower. You really feel like your eyes are playing tricks on you or the manufacturer screwed up. If you don’t have the poles set up like they are in the diagram, the screw holes at the top will not line up. After that is was not bad. My husband commented that power tools made this a lot easier. It seems very sturdy. The adjustable shade is perfect as we have no shade trees and get sun all day. Others commented that it sags a little in the middle, but ours looks pretty good. Overall we love how it looks and we are really with our purchase! happy with this!
Aurora 9' W x 9' D Aluminum Pergola with Canopy

Aurora 9' W x 9' D Aluminum Pergola with Canopy

$648.99

Rated 4 out of 5 stars.

05/09/2020
Made of aluminum? Hollow. Lightweight. Pretty sturdy though. Silver, painted black with a baked on matte finish. Rainwater kind of stained the finish so you could still see the water marks after the rain. I didn't like that but it didn't really matter once I stopped focusing on it. Easy-ish to put together if you're vaguely handy. Lots of fasteners. I hated the instructions. Just a pictogram with reference to which lettered part you needed to use. Some minutes were spent with me staring at the picture for a long time trying to figure out what was happening. I did kind of screw up a couple of things and had to redo them and I broke two screws in the process. The screws are the typical weird Chinese metal that seems to bend without much effort. So, be careful with that, try not to strip anything. They did give you an allen wrench to use . If you have ratcheting socket thingamabob that fits, it will go together much faster for you. I had to try to find replacement screws at the hardware store. There were no exact replacements. They're metric, but not a standard size and I had to just rig it as best I could. If you're putting this on a patio or deck you're going to want to find a different way to bolt it down. Heck, even in the yard, you'll probably need some more grip to keep it stationary. It comes with this foot piece that is held to the grass with something like tent pins. I can't see that really holding anything down. I feel that if the canopy is open, a good gust of wind will take this and send it flying. Especially if your ground is damp in the tent pins have no grip. If that happens it will surely break . It's very lightweight. I used some L-shaped deck brackets and made a square and bolted that to deck, then put 2, two-by-fours scraps about 8" long and bolted them on end to the L brackets and made like a little rectangle post. Then I placed the hollow legs of the pergola over the two-by-four scrap posts (the two-by-fours were inside the legs) It stayed put and I think it gave it more stability. The canopy was nice. Made from a woven plastic material. Not cloth. Cast a nice shade, but is not waterproof. Water drips through. Be sure to pay attention to the direction you place the pergola, because the canopy only opens in one direction and the other side is stationary. Opening of the canopy is done manually by you moving a little plastic handle to open and close it. If you're shorter than 5'7" you won't be able to reach it easily. I had to do it on my tiptoes. You might want to see if you can add an extension pole to it somehow. On opening/closing it does kind of hang upon the track and that is a little bit annoying. It seems to be true to measurement as described. Overall, I feel like it was worth the sale $200 I spent on it. Is it high high-quality? No. Will it last more than one season? Probably, if I take care of it. I can't see this bearing much weight so if anybody hangs on it or leans on it, it's going to bend. I took it all down for the winter as I live in the frozen midwest so hopefully it will go back up just fine next spring. Taking it apart and storing it was fairly easy as well. It's just time consuming with all the bolts. Be sure to put aside a couple of hours putting it together, maybe four? And taking it apart I think it took me about an hour. You're going to need a helper when you start putting things up vertically. Overall I think it was fair price for a fair product
Kingston 7 Ft. W x 7 Ft. D Vinyl Pergola

Kingston 7 Ft. W x 7 Ft. D Vinyl Pergola

$569.99

Rated 5 out of 5 stars.

03/17/2021
Lightweight, attractive, and sturdy as a PVC structure is going to be. If you push on it, even when secured into the ground, it will give slightly and return to straight. Well worth the price for the value. Note: it does take some time to put it together, the 4 hour/2.5 hour estimate is probably based on someone who is familiar with putting it together. Took 3 people about 6 hours from box opening to digging holes for it to rest in. The various pole caps will securely fit even with no glue added to them. The advertisement/instructions say it comes with four steel u shape ground anchors that are 30”, 18” inches to put in soil and 12” to put in pvc pole, however what comes is four u shape 24” pvc ground anchors, and the instructions in the box say 18” in soil and 8” in pole which actually adds up to 26” not 24”. When I spoke to Wayfair support all they could tell me was ‘go with my gut’ on how deep I should put the anchors in the soil and pole since the math did not add up and it also did not match what was advertised, ie steel not pvc. They also offered for someone to put it together for us for the standard fee if we were not able to decide the depth, but said they figured we could do it ourselves. This is not a criticism of the Wayfair support, just a presentation of facts so you know what to expect on the ground anchors. Also, the ground anchors and poles are not pre drilled, so you will need a drill bit so you can secure the 2 screws per anchor needed to the pole. There are a few other places there are no pre drilled holes where screws are expected to secure cross poles, but pre drilling those holes is no necessary, but you will probably need a power drill and not a screw driver. Some of the screws will easily go in with a screw driver as desired. Overall it is worth the purchase even though it has some issues: pvc not steel ground anchors, which are actually better since they will not rust, not pre drilled, and the instructions are wrong for the anchors.
ServerT:2.7044930458069