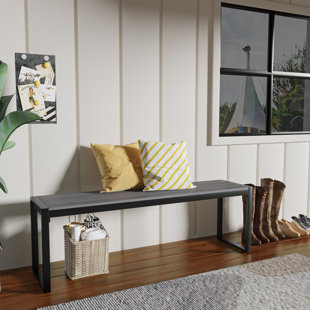
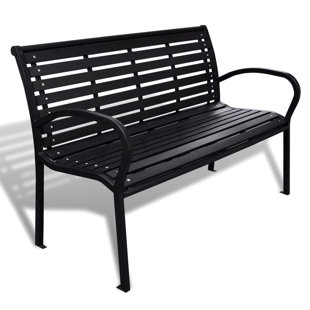
This patio bench can be used wherever hard-wearing and weather-resistant, yet comfortable seating is required. Applications include parks, school playgrounds, colleges, etc. It has a generous length of 47.2", which is typically ample space for seating up to 3 people. The frame is made of steel. The slats are made of wood plastic composites (or WPC), a combination of wood and plastic, which is a safe and long-lasting material for outdoor use. The garden bench can be easily bolted to the floor. This 3-seater garden bench is a good choice for any garden or outside space. Material: Steel + WPC (Wood plastic composites). Color: Black. Size: 49.2" x 23.8" x 31.7" (L x W x H). Seat width: 47.2". Seat depth: 16.5". Seat height from the ground: 15.4". Finish: Paint. Weather-resistant. Max. loading capacity: 242.5 lb. Cushion included: No.
- Seating Capacity: 2
- Weight Capacity: 661.39lb.
- Overall: 32'' H x 49'' W x 24'' D
- Seat: 15.4'' H x 47.2'' W x 16.5'' D
- Assembly Required: Yes
It's a very nice bench, but the instructions are bad - no words, just diagrams. So here are some words to simplify your assembly:
1. there are 4 parts to the bench that need to be connected - left and right arm & leg pieces, a seat, and a seat back. They are all connected with the same size bolts (with washers). A small wrench is included, but I found it tedious to use, if you have your own adjustable wrench or drill with socket (3/8"), it will facilitate assembly.
2. Don't follow the first illustration which shows the first step as connecting the seat bottom to both the left and right arms. If you do that, as I did, you will not be able to follow the next step of connecting the seat back. Instead, connect the seat AND the seat back to one of the arms first. Then do the same to the other arm.
3. Do not fully tighten the bolts until after you have all four pieces connected. This will allow for some wiggle room for lining up the bolts with their holes and the nuts that are permanently attached to each of the four pieces.
4. Once assembled, go back and tighten all the bolts.
5. Enjoy your new bench.. Paul. Queens Village, NY. 2020-05-31 09:42:53